
Fusing Glass – The Process
How do I make fused glass pieces? The process is surprisingly simple but extremely time consuming. It may take me less than an hour to design and construct the basic piece but it takes approximately 30 hours of heating and cooling cycles in the kiln to complete each piece. Due to my kiln size, I can only make one piece at a time.
Step 1 – Design and Glass Cutting
I have an inventory of transparent and opaque sheets of fusible glass that I am able to cut into smaller shapes and fit together like a jigsaw puzzle. Note that I used the term ‘fusible’ glass. This denotes glass that when heated to a liquid state will stick or ‘fuse’ to another piece of glass. Each piece of glass to be fused together must have the same thermal expansion properties. This means that they expand and contract at the same rate. If they changed dimensions at a different rate as they heated or cooled, they would crack or shatter. Because of this, I only use COE 96 glass (COE = coefficient of expansion).

Getting all my ducks (I mean glass strips) in a row
To create geometric shapes, I score each sheet of glass with a glass cutter and then snap the glass to break it apart. If needed, I can smooth any rough edges using a grinder. I then piece everything together into a flat, 2D pattern. Most pieces consist of 2 layers of glass although some can have sections with as many as 4 different layers. Altogether, a piece can consist of over 100 individual pieces of glass although many may have less than 10 separate components.
Step 2 – First Fuse
Once all the glass sections are assembled, the piece must be transferred to the kiln to fuse the individual components into a single piece of glass. I fire my glass using a Paragon Janus 1613 kiln which can accommodate pieces up to ~12 inches. Glass fusing kilns are similar to kilns used for ceramics. However, there is a key difference. Glass kilns have their heating elements on the top for even heat distribution and ceramic kilns heat from the sides. You will find some people who will use their kilns for both glass and ceramics. I am a purist and have no plans to fire ceramics with my kiln.
Fusing glass in the kiln is actually a multi-step process involving melting and annealing. The times and temperatures shown below are specific to my kiln and firing conditions (high altitude). Experimentation is required to find the optimal processing conditions.
Initial heat phase – Bring the glass up to 1150F. At this point the glass has softened but is not fused. Holding the piece at this temperature for a while will allow all the components to soften and any air bubbles that may have been trapped between the layers to escape.
2nd stage of heating – Ramping the temperature up to around 1375F will allow the glass to transition to a liquid. If you stop heating at this point, the glass layers will stick together but will not have fused into a single flat sheet. This is called tack fusing or contour fusing. ‘Bumps and lumps’ will be present showing the individual components of the piece.
Fuse – Take the temperature up to 1460F to fully fuse all the components of the piece. Depending on the overall thickness and size of the piece, this may only require a few minutes.
Quench/Cool to Anneal – Cool the kiln rapidly to 950F. Note that ‘rapid’ is a relative term. This can actually take more than an hour. The glass transitions from liquid back to solid.
Anneal – Allow the glass to continue the transition from liquid to solid phase by holding at 950F for an hour. The temperature is hot enough for all the glass molecules to find their happiest, lowest energy and stress state before getting ‘frozen’ into a final position. This is what is known as annealing. It is very important to not open the kiln and peak at the piece during this cool down period. Sudden influx of room temperature air can cause thermal shock and breakage.
Cool – The piece continues to cool in the kiln. This is the hardest part of the process – the waiting. To prevent thermal shock and breakage, you cannot even peek in the kiln until it is under 200F! I often leave the kiln cooling overnight so I am not tempted to look until the morning.
Once the kiln is cool enough, remove the flat piece with all the components fused into one sheet. This is beautiful and could be displayed on a wall or shelf as a finished work of art. This is the stopping point when making coasters. However, this is usually the halfway point…
Step 3 – Slumping
Now things get fun! Time to turn your flat piece into a sculptural masterpiece. Obviously, more heat is needed to add shape to the work. At high temperature, when the glass is softened but not melted, it can slump into or drape over a mold. This is how flat pieces can be transformed into plates, bowls, and vases, etc.
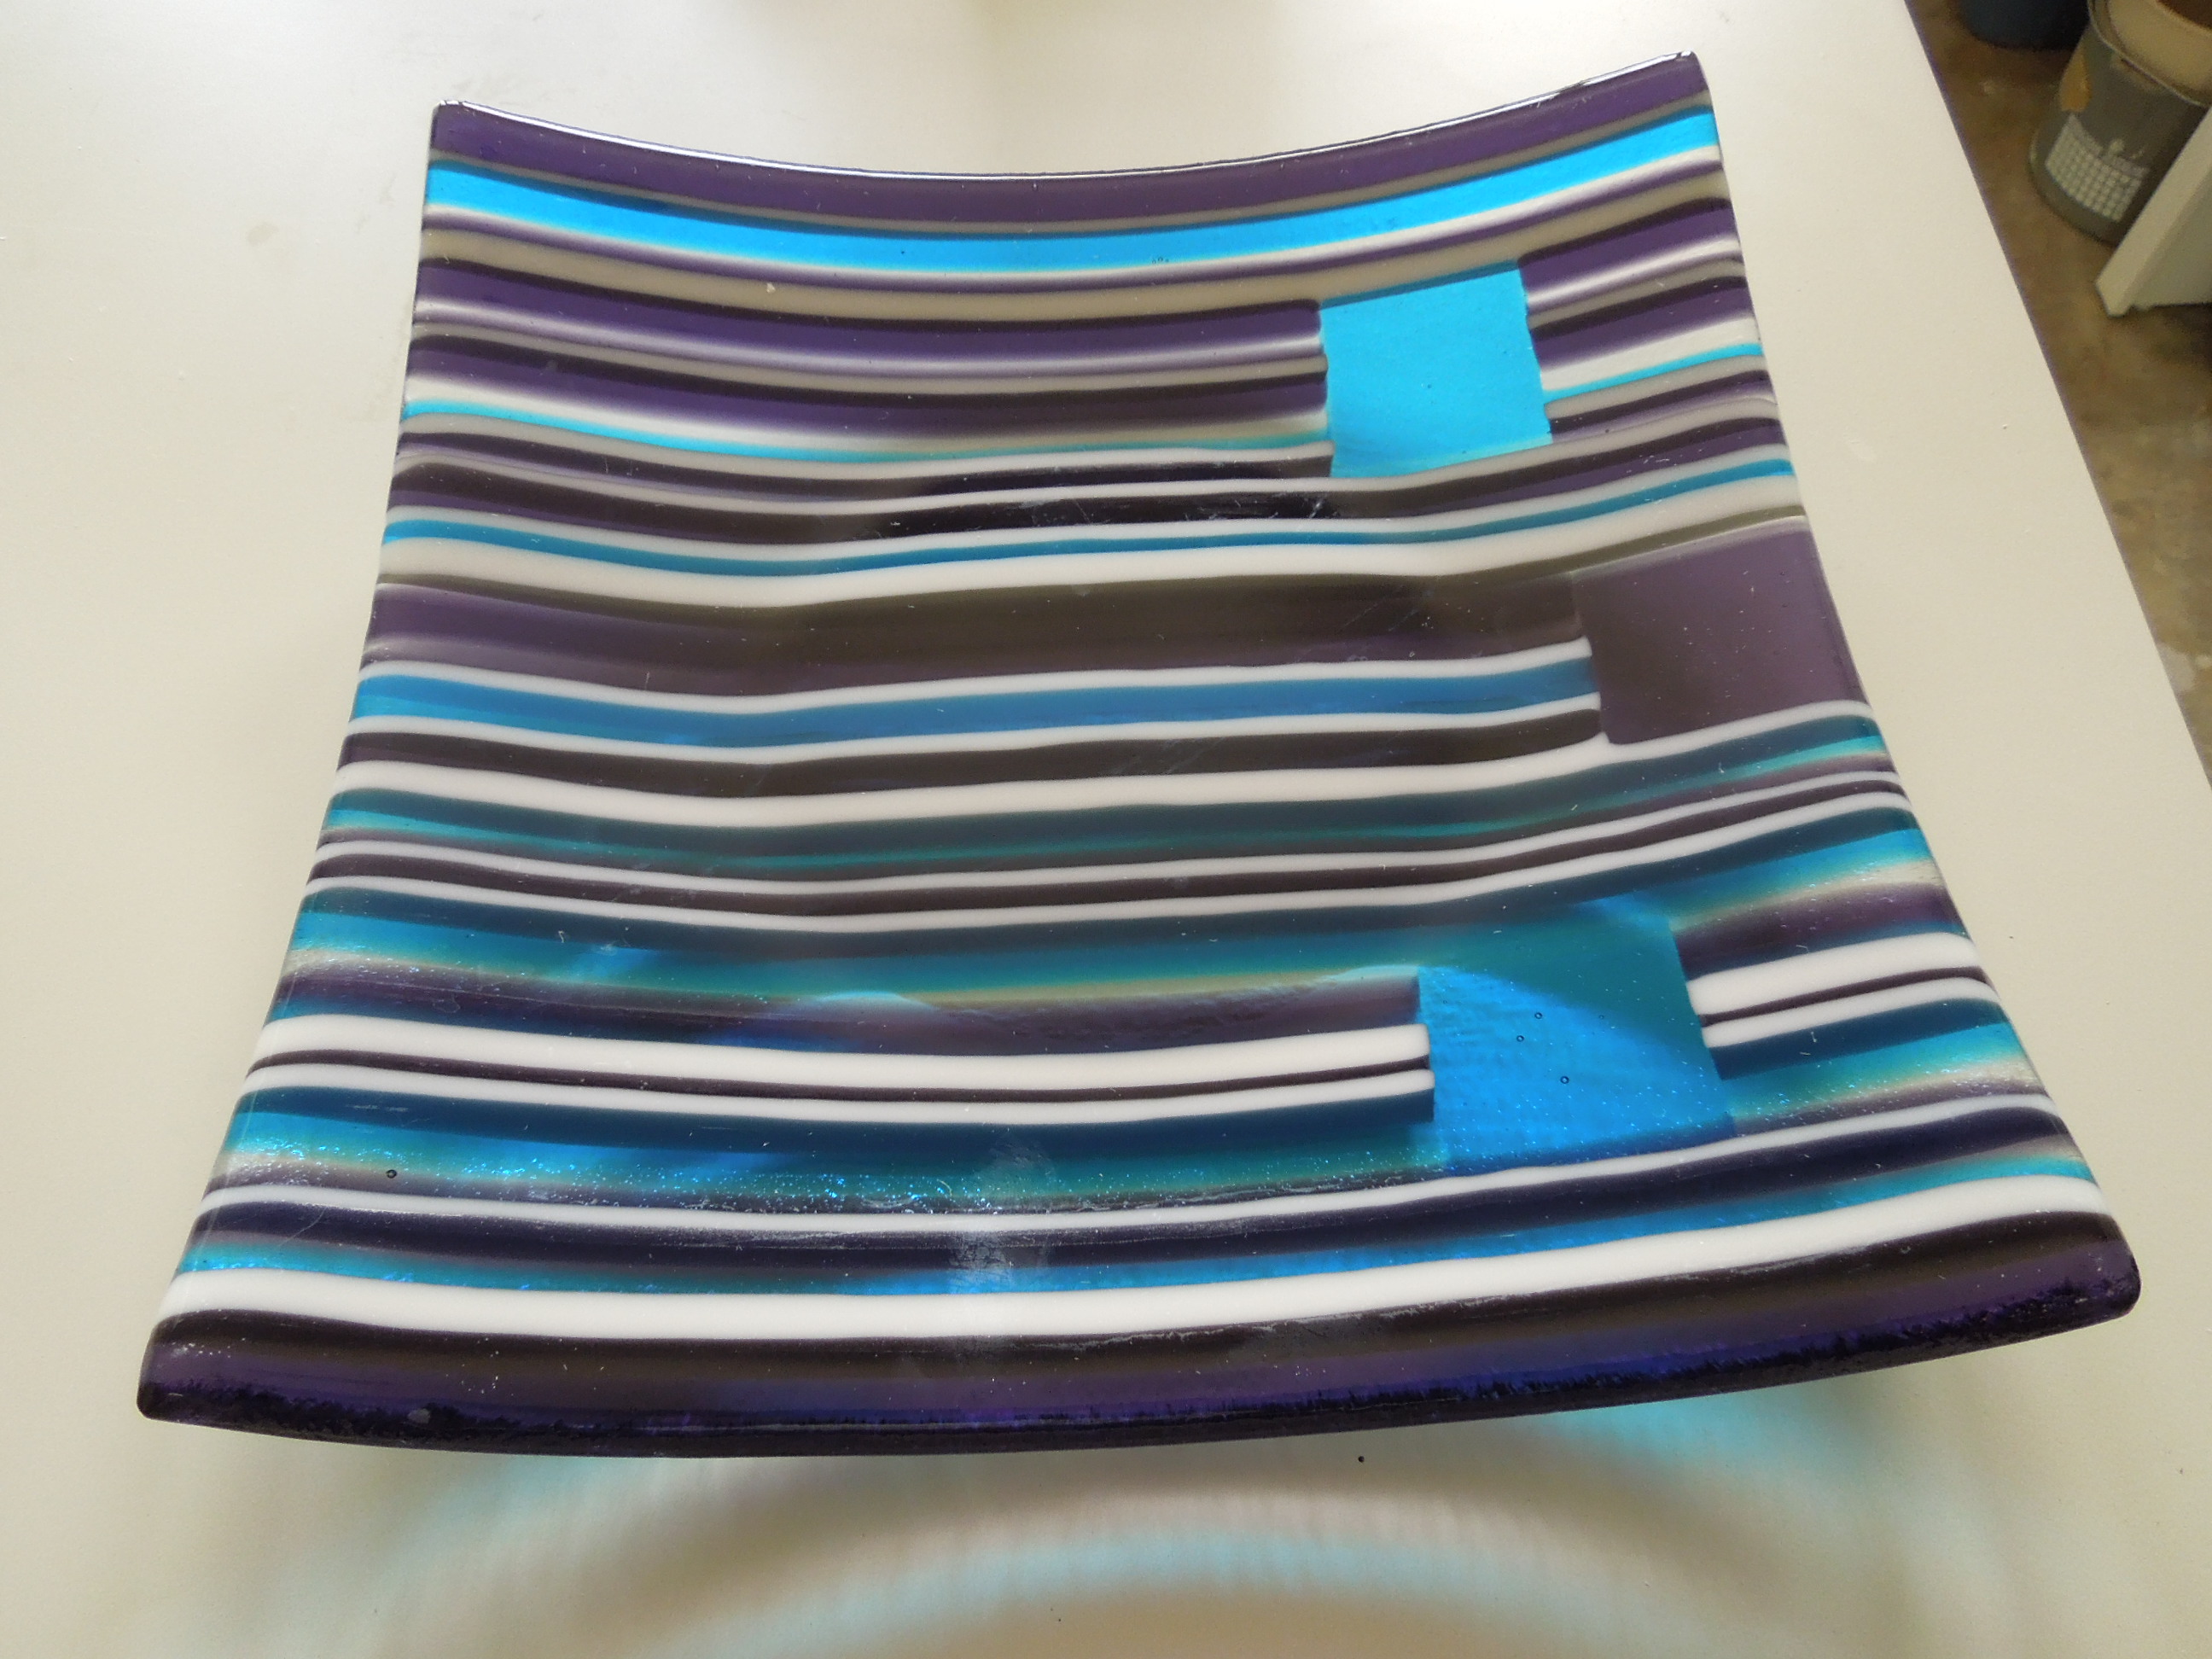
Viola! Finished fused and slumped plate
The Slumping process is very similar to the flat fuse process. The 2 main differences – a slower ramp up to temperature and the ultimate temperature is significantly lower. I typically ramp the kiln to 1225F and hold it for several minutes to allow the glass to slump into the mold. The slumping process needs to be closely monitored. You need to hold long enough to allow the glass to change shape but not so much it puddles into a lump at the bottom of the kiln or your mold. You are allowed to peek into the kiln for this (but very, very briefly!). An anneal and cool process follows.
Once completely cool, remove the slumped, fused glass art and enjoy!


Leave a comment