
Framed!
To remember my father, I wanted to preserve a picture of him in a special picture frame. Purchasing a mass produced frame was not going to do him justice. So began my fun journey into making unique fused glass picture frames. In fact, I had so much fun and bursts of creativity that I made a number of frames over a 2 week period. Some of these have already been given as gifts, sold on my Etsy site, and preserved for my own use. I want to share my technique and a few of my pieces here.
First decision – what size picture are you framing? Most of my frames are designed for 4″x6″ pictures but I could just fit a frame for an 8″x10″ into my kiln.
Second decision – what basic color do you want your frame to be? Choose opaque glass for the base frame since you will be gluing a traditional frame on the back.
Now, time to start cutting the glass. Use of a ruler is a must since you’ll want everything to actually fit together well. For a 4″x6″ frame, you will need: 4 rectangles 5″x 1.5″ and 4 rectangles 6.5″x1.5″ For an 8″x10″ frame, go with 4 10″x1.75″ and 4 12″x1.75″ rectangles. If you’re doing your math and laying this out you might be wondering why so many pieces. The secret is you need to double up the glass when fusing to get it thick enough and allow any seams to be fused away.
Lay the first layer out like so:

Then lay out the second layer but stagger the pieces differently so the seams on the top and bottom layer don’t line up. This will allow all the pieces to fuse together into a single frame of glass. Here is what a basic frame looks like after a standard full fuse (to 1460 F for 3 min).

Pretty boring yes? But it’s a great starting platform for decoration and additional fusing.
It is also possible to add more features during the initial frame fusing step. In this example, I laid out the white frame pieces and then placed millefiori dots in a random pattern on top.
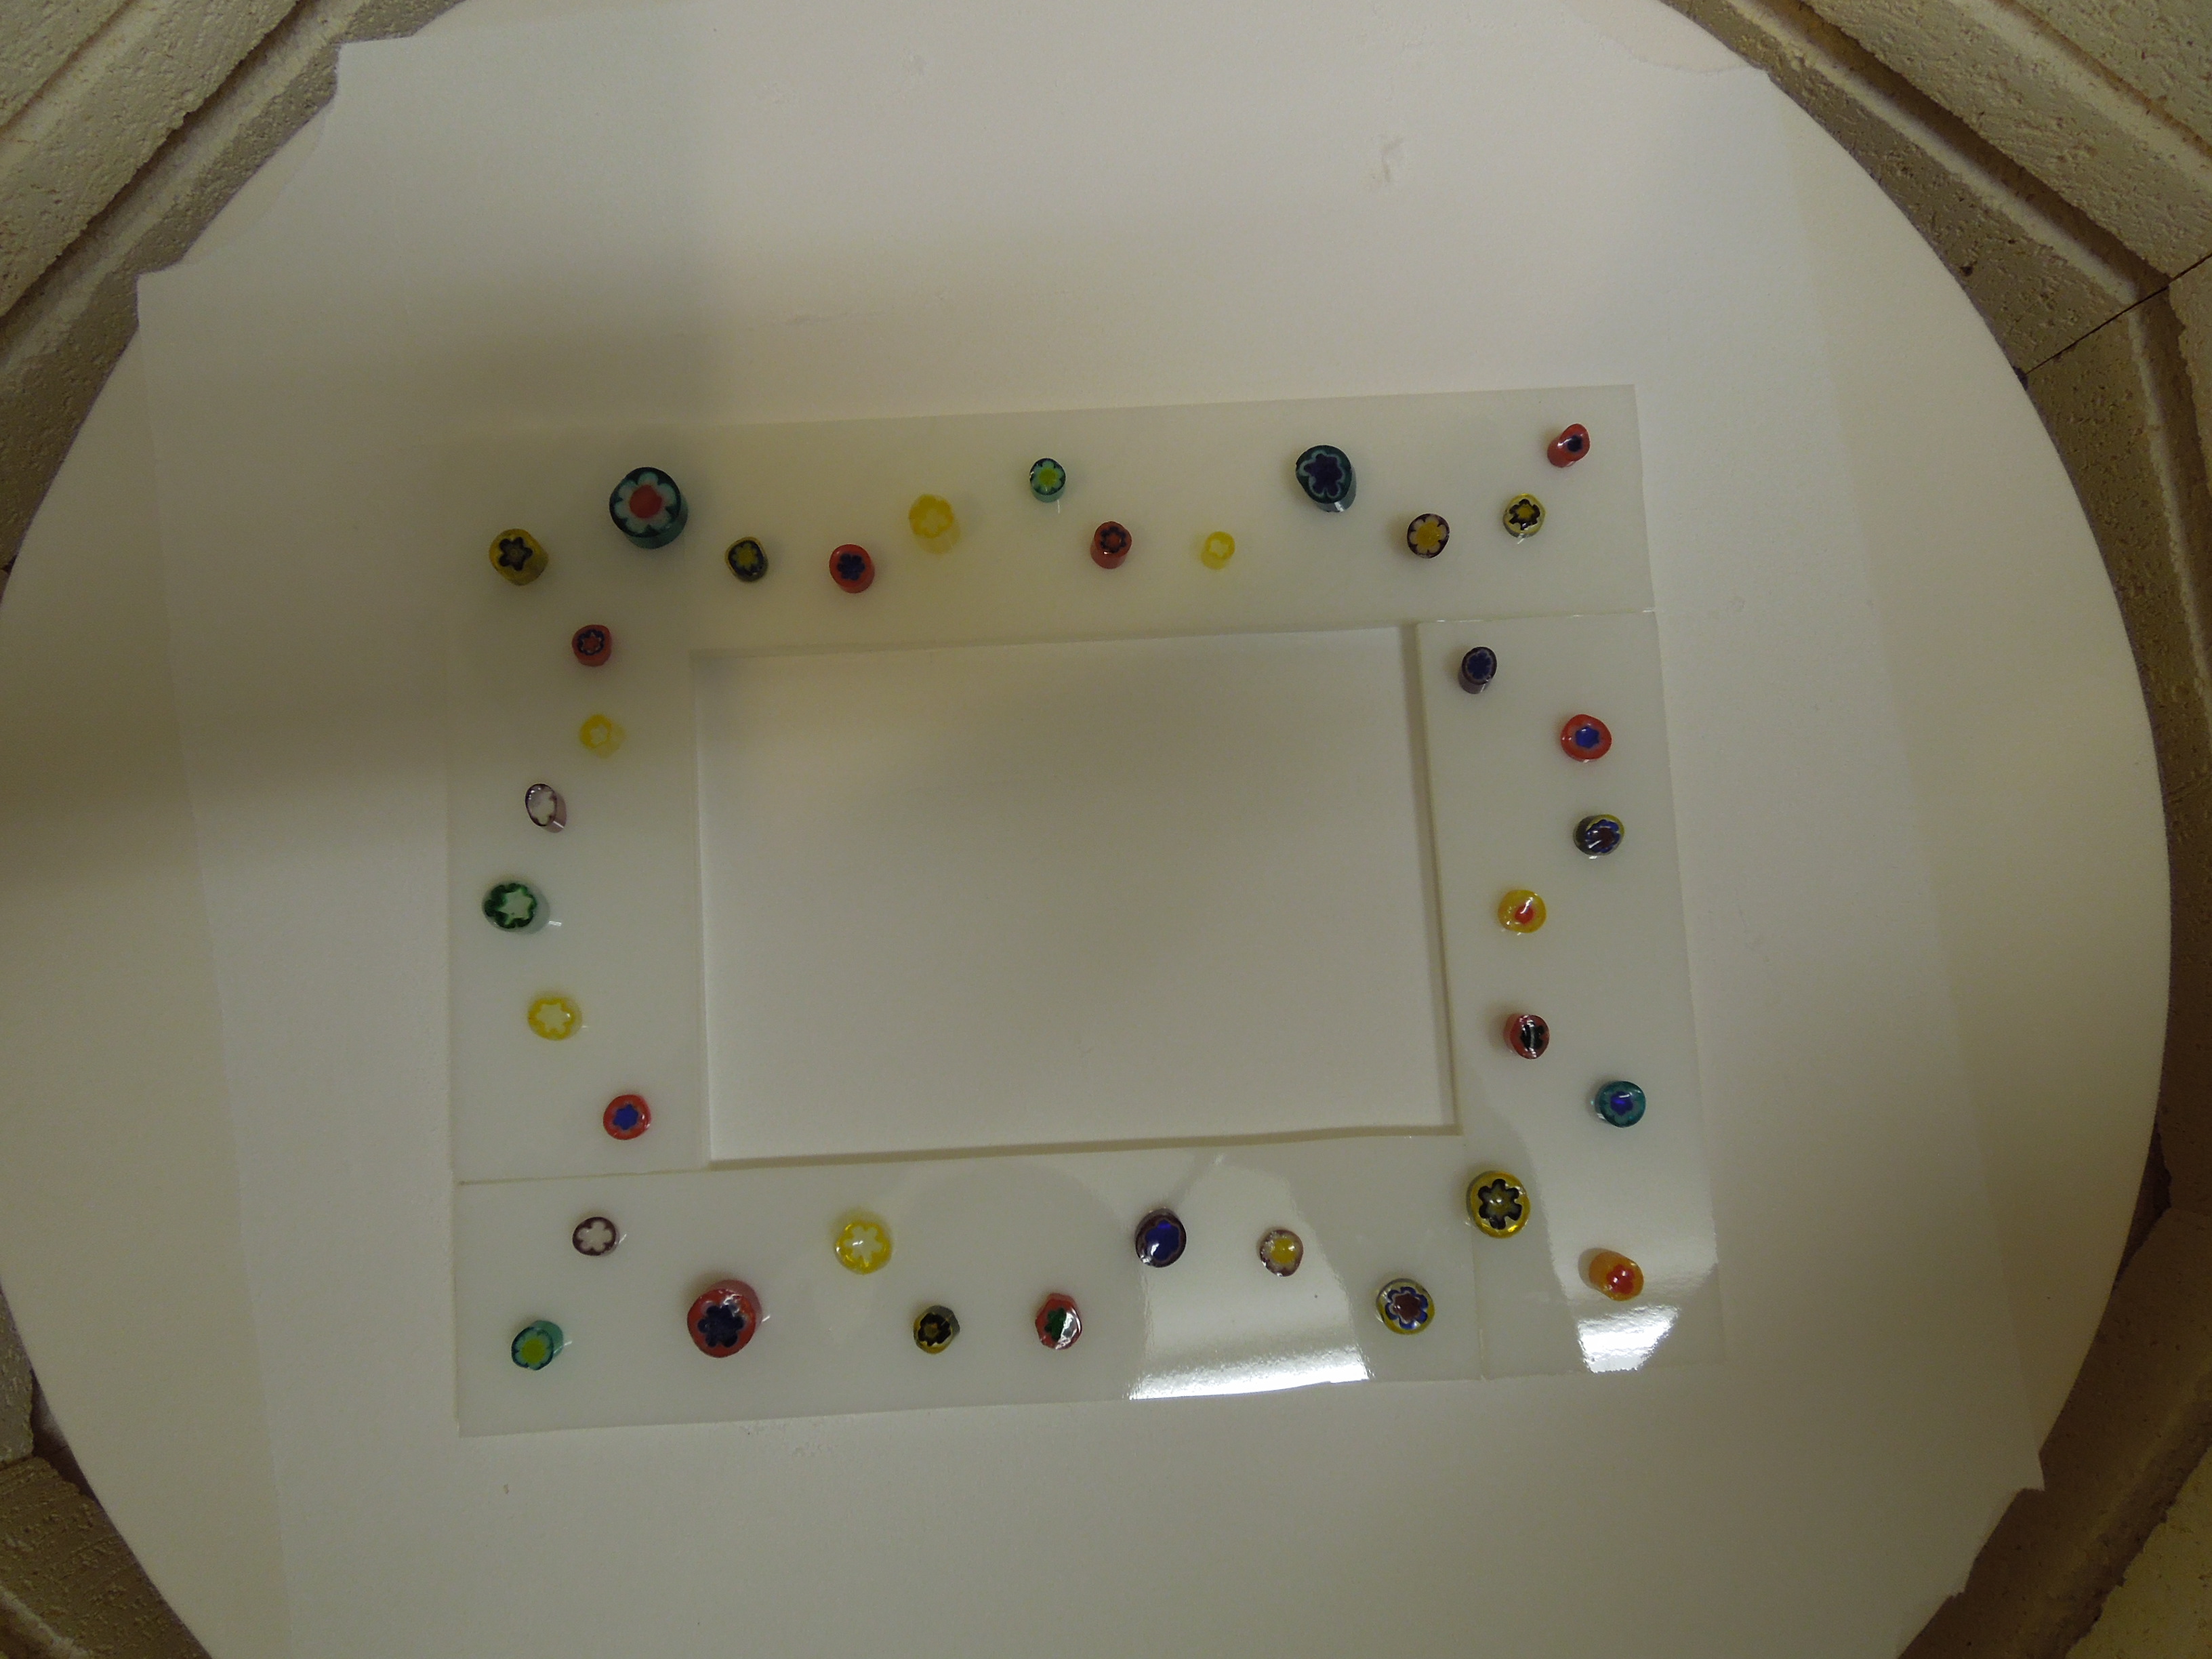
Here’s the final result:

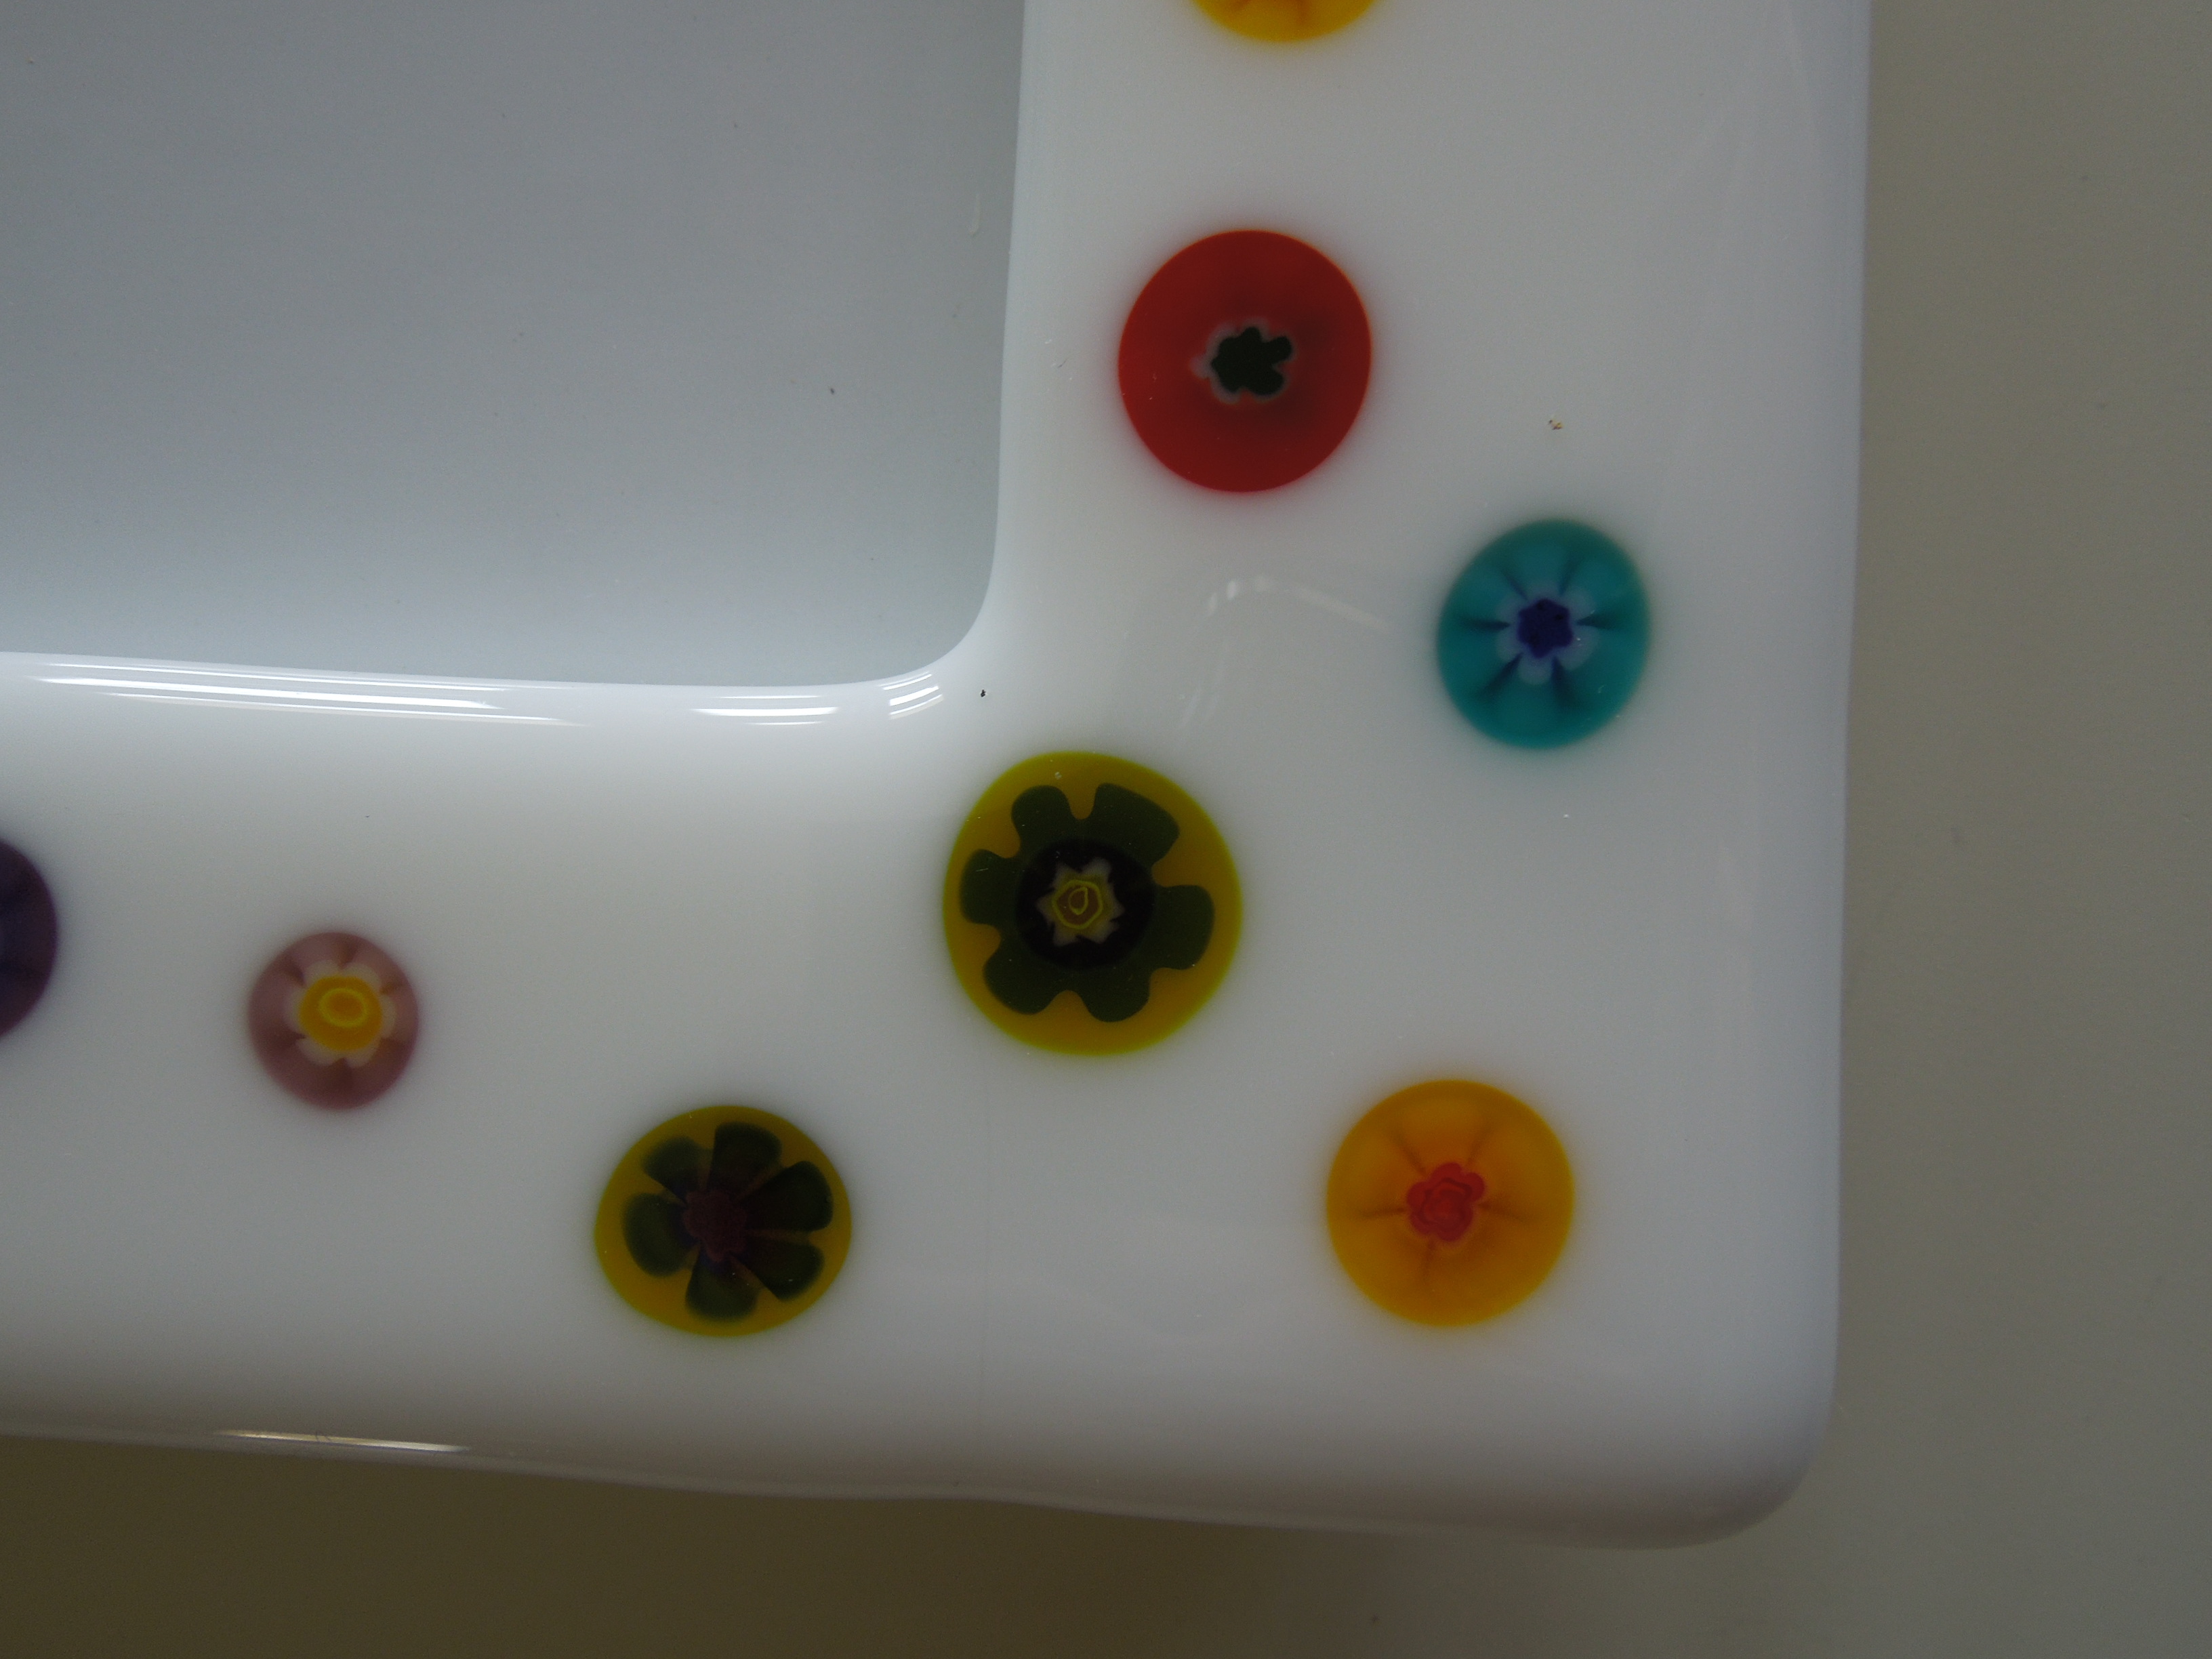
The millefiori completely fused into the white frame creating this fun and whimsical frame. To complete it, glue a basic frame onto the back. I buy cheap frames on sale from Michael’s and use E600 glue to bond the frame to the glass.
Now I’m having fun!
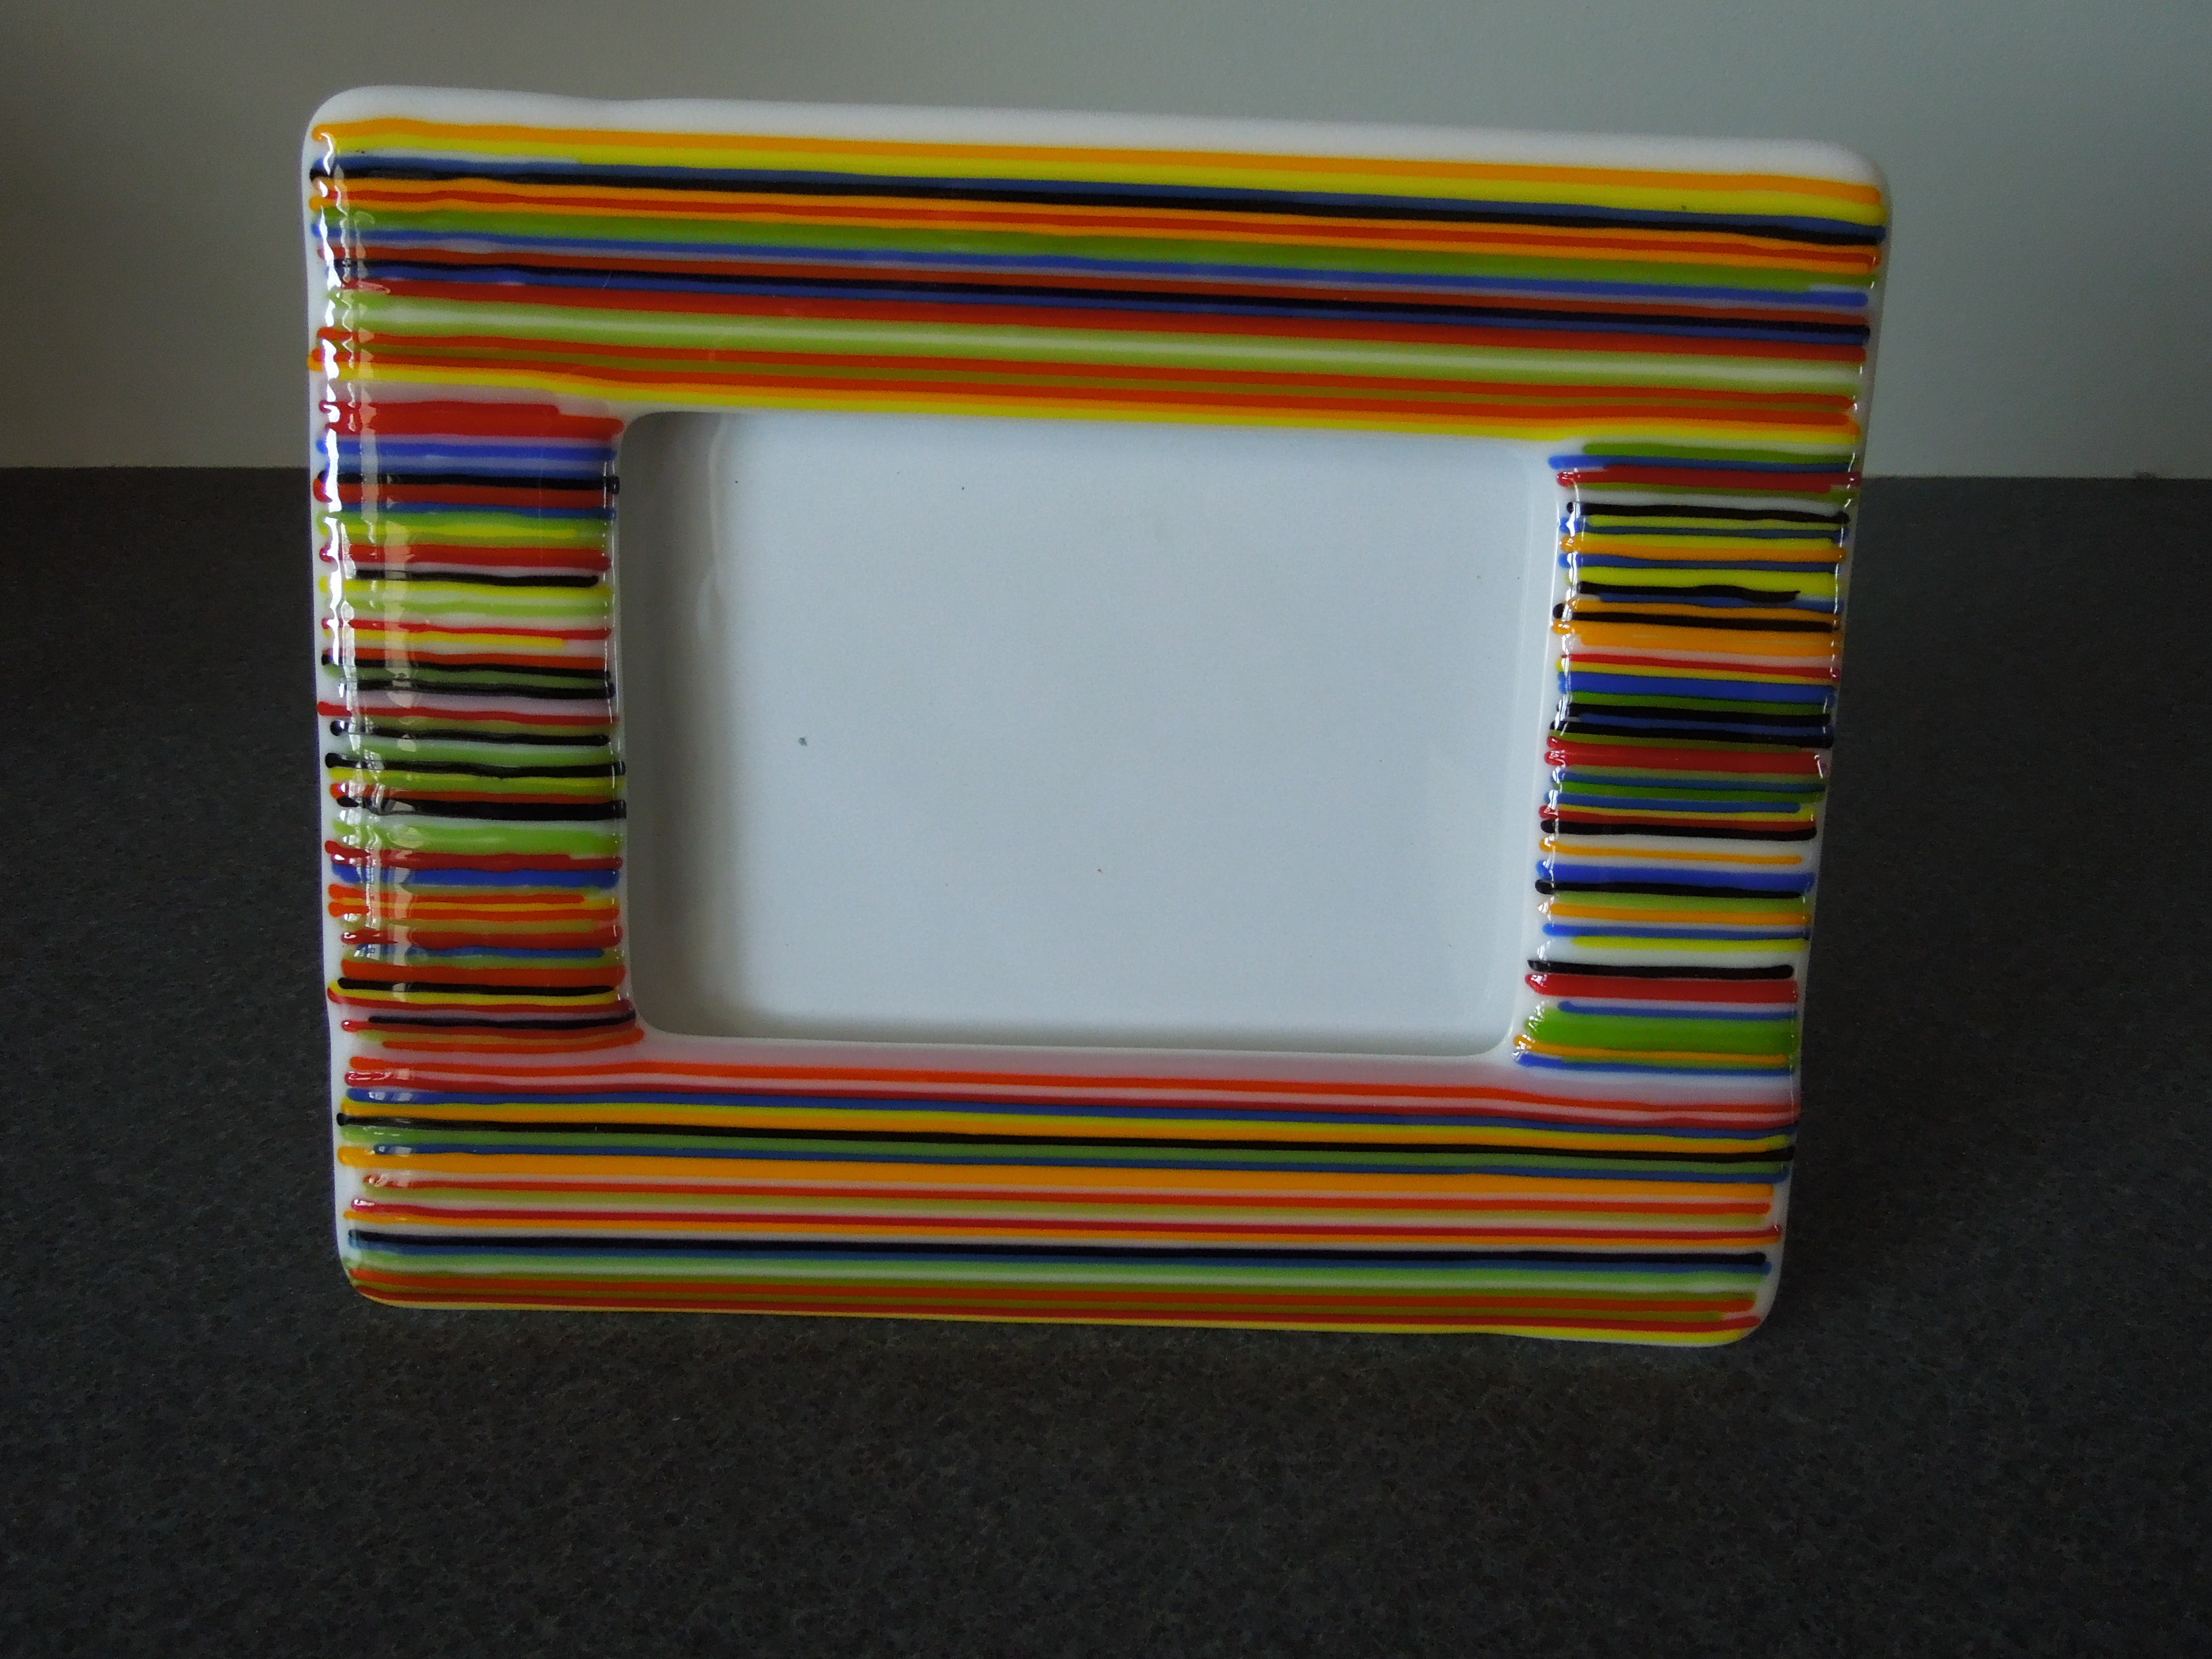
Next project took the basic white fused glass frame and aligned multi-color stringers of glass across it. Note that I use a little elmer’s glue to tack the glass rods in place. A full fuse (the second fuse of the project) melded all the lines into stripes.

When adding decorative pieces of glass to the base frame, you do not have to do a full fuse. Tack fusing (don’t ramp to such a high temp – go to ~1375 F) will add topography to highlight the decorations.
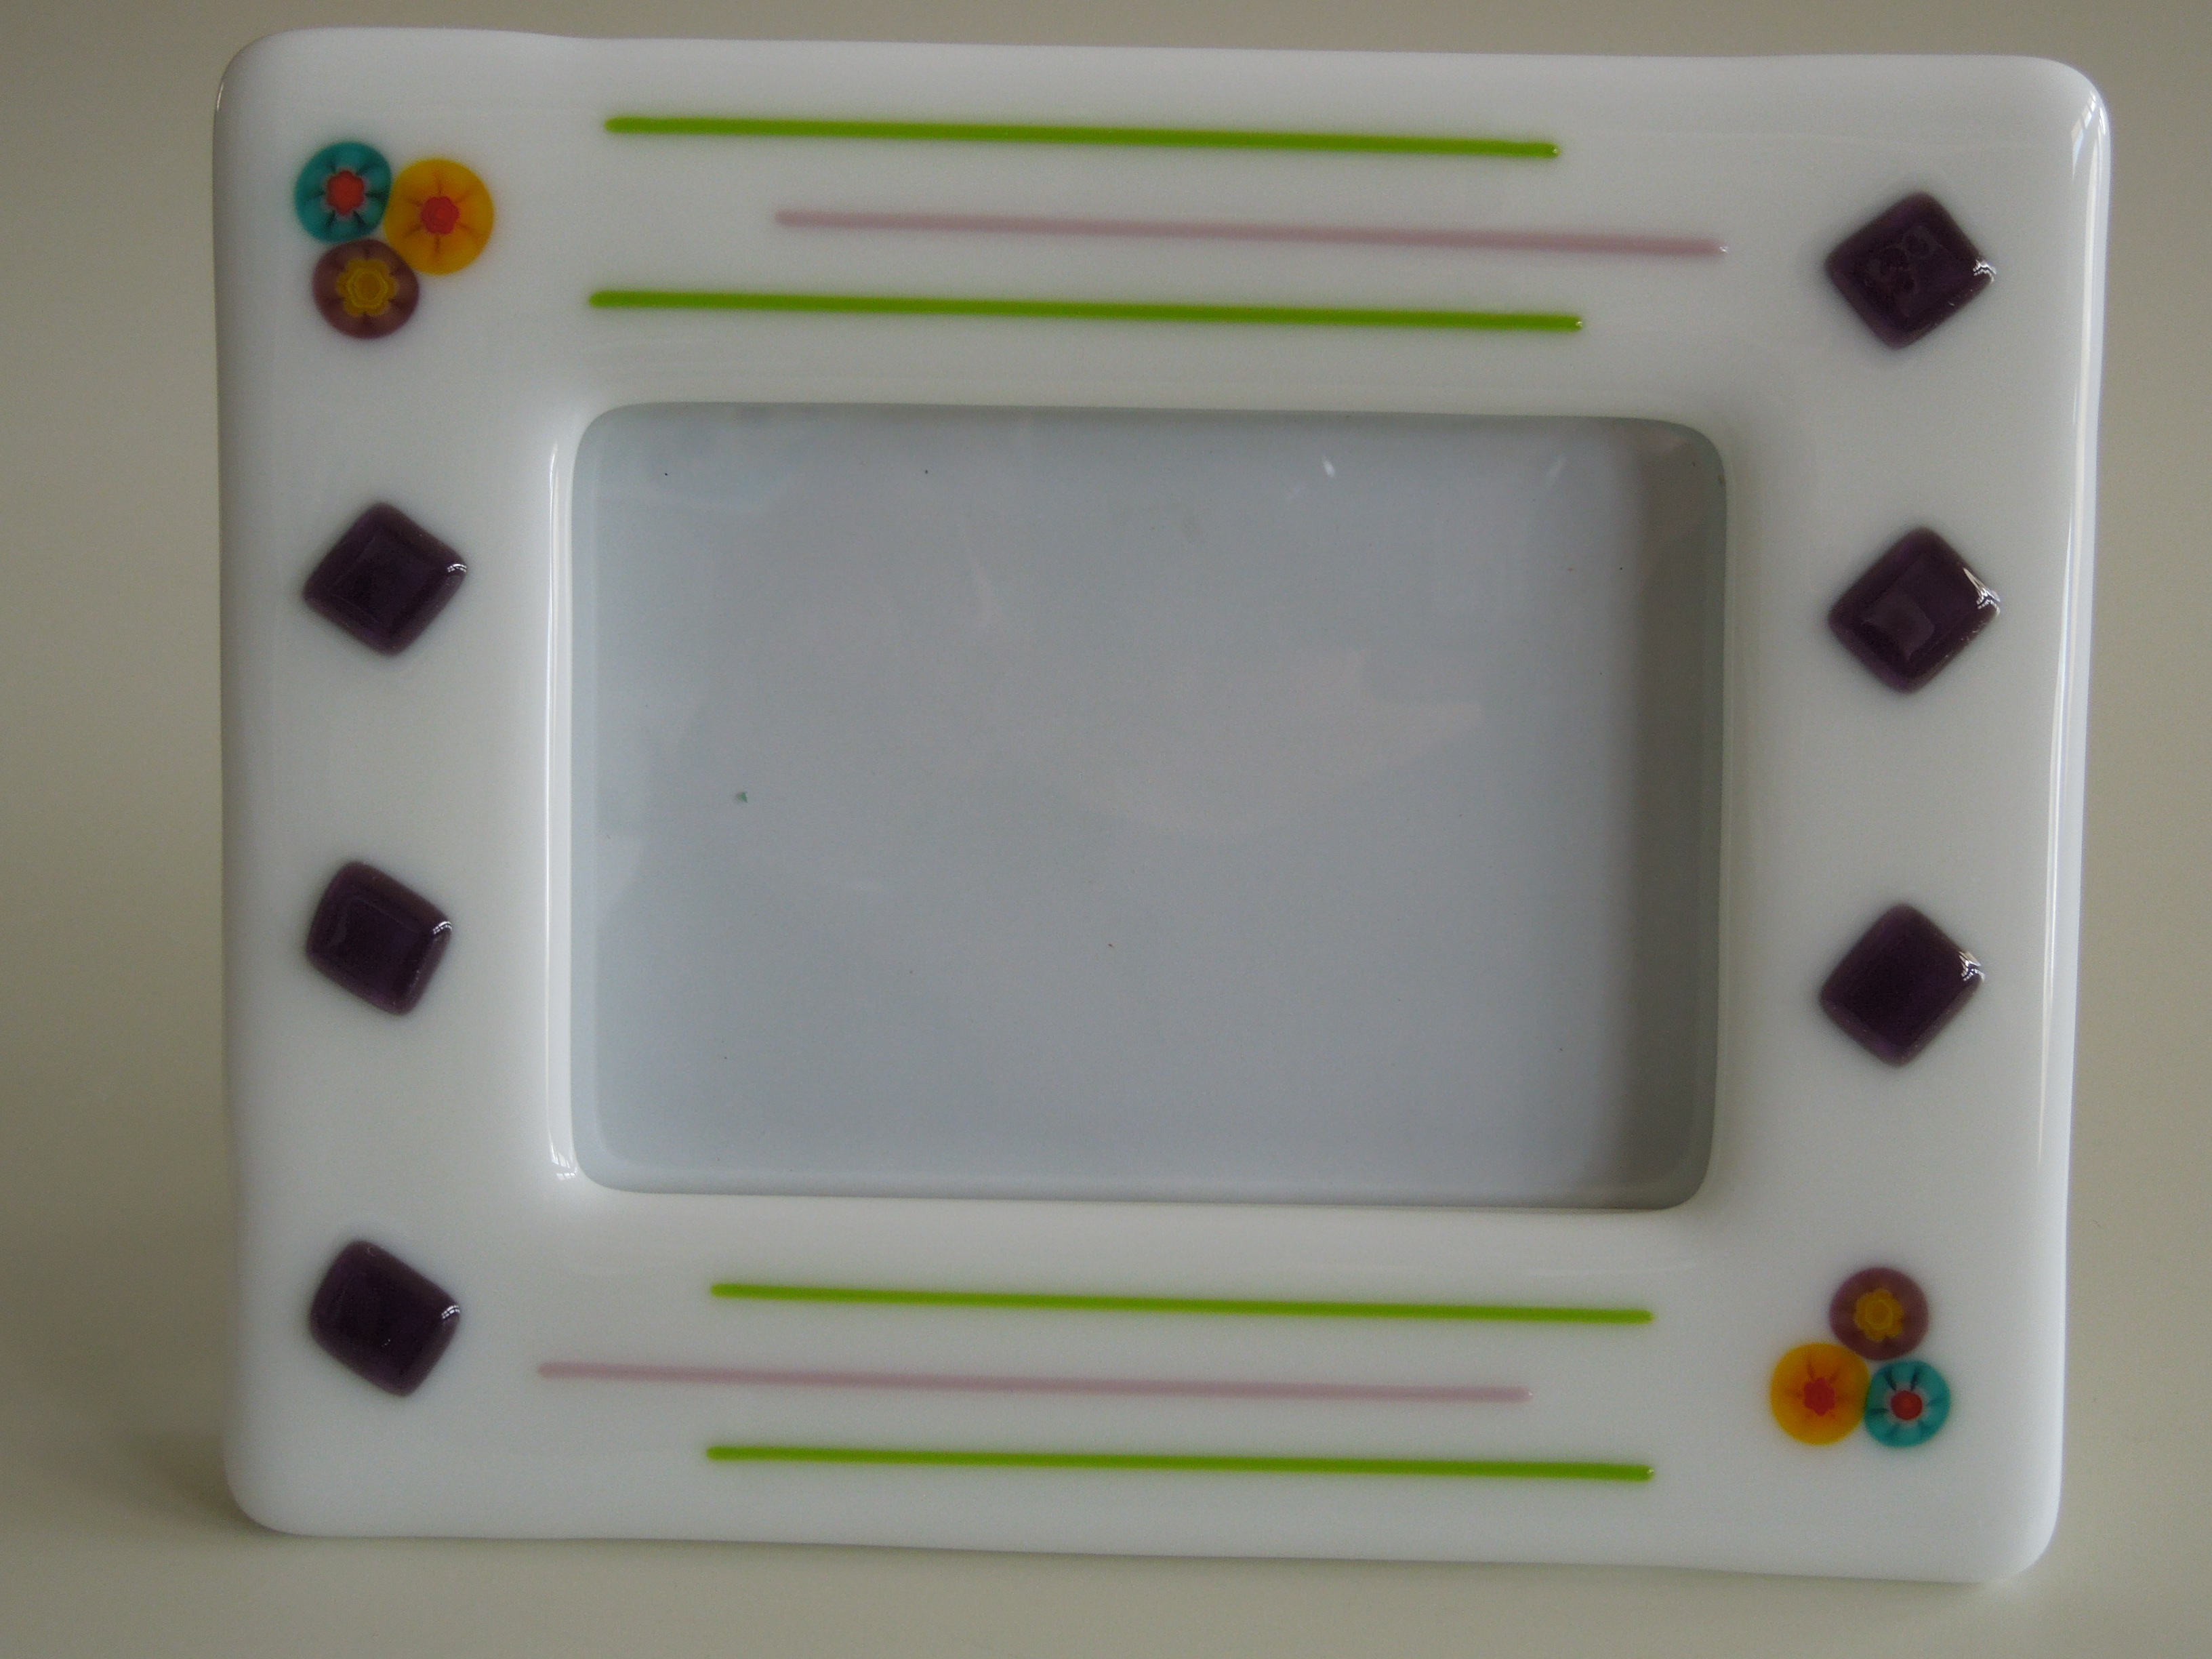
In this next example, I created the white frame and millefiori trios during a full fuse. Then, I followed up by tack fusing some green and pink stringers along with blue diamonds.
Are you starting to get the sense that the sky’s the limit for embellishing the frames?
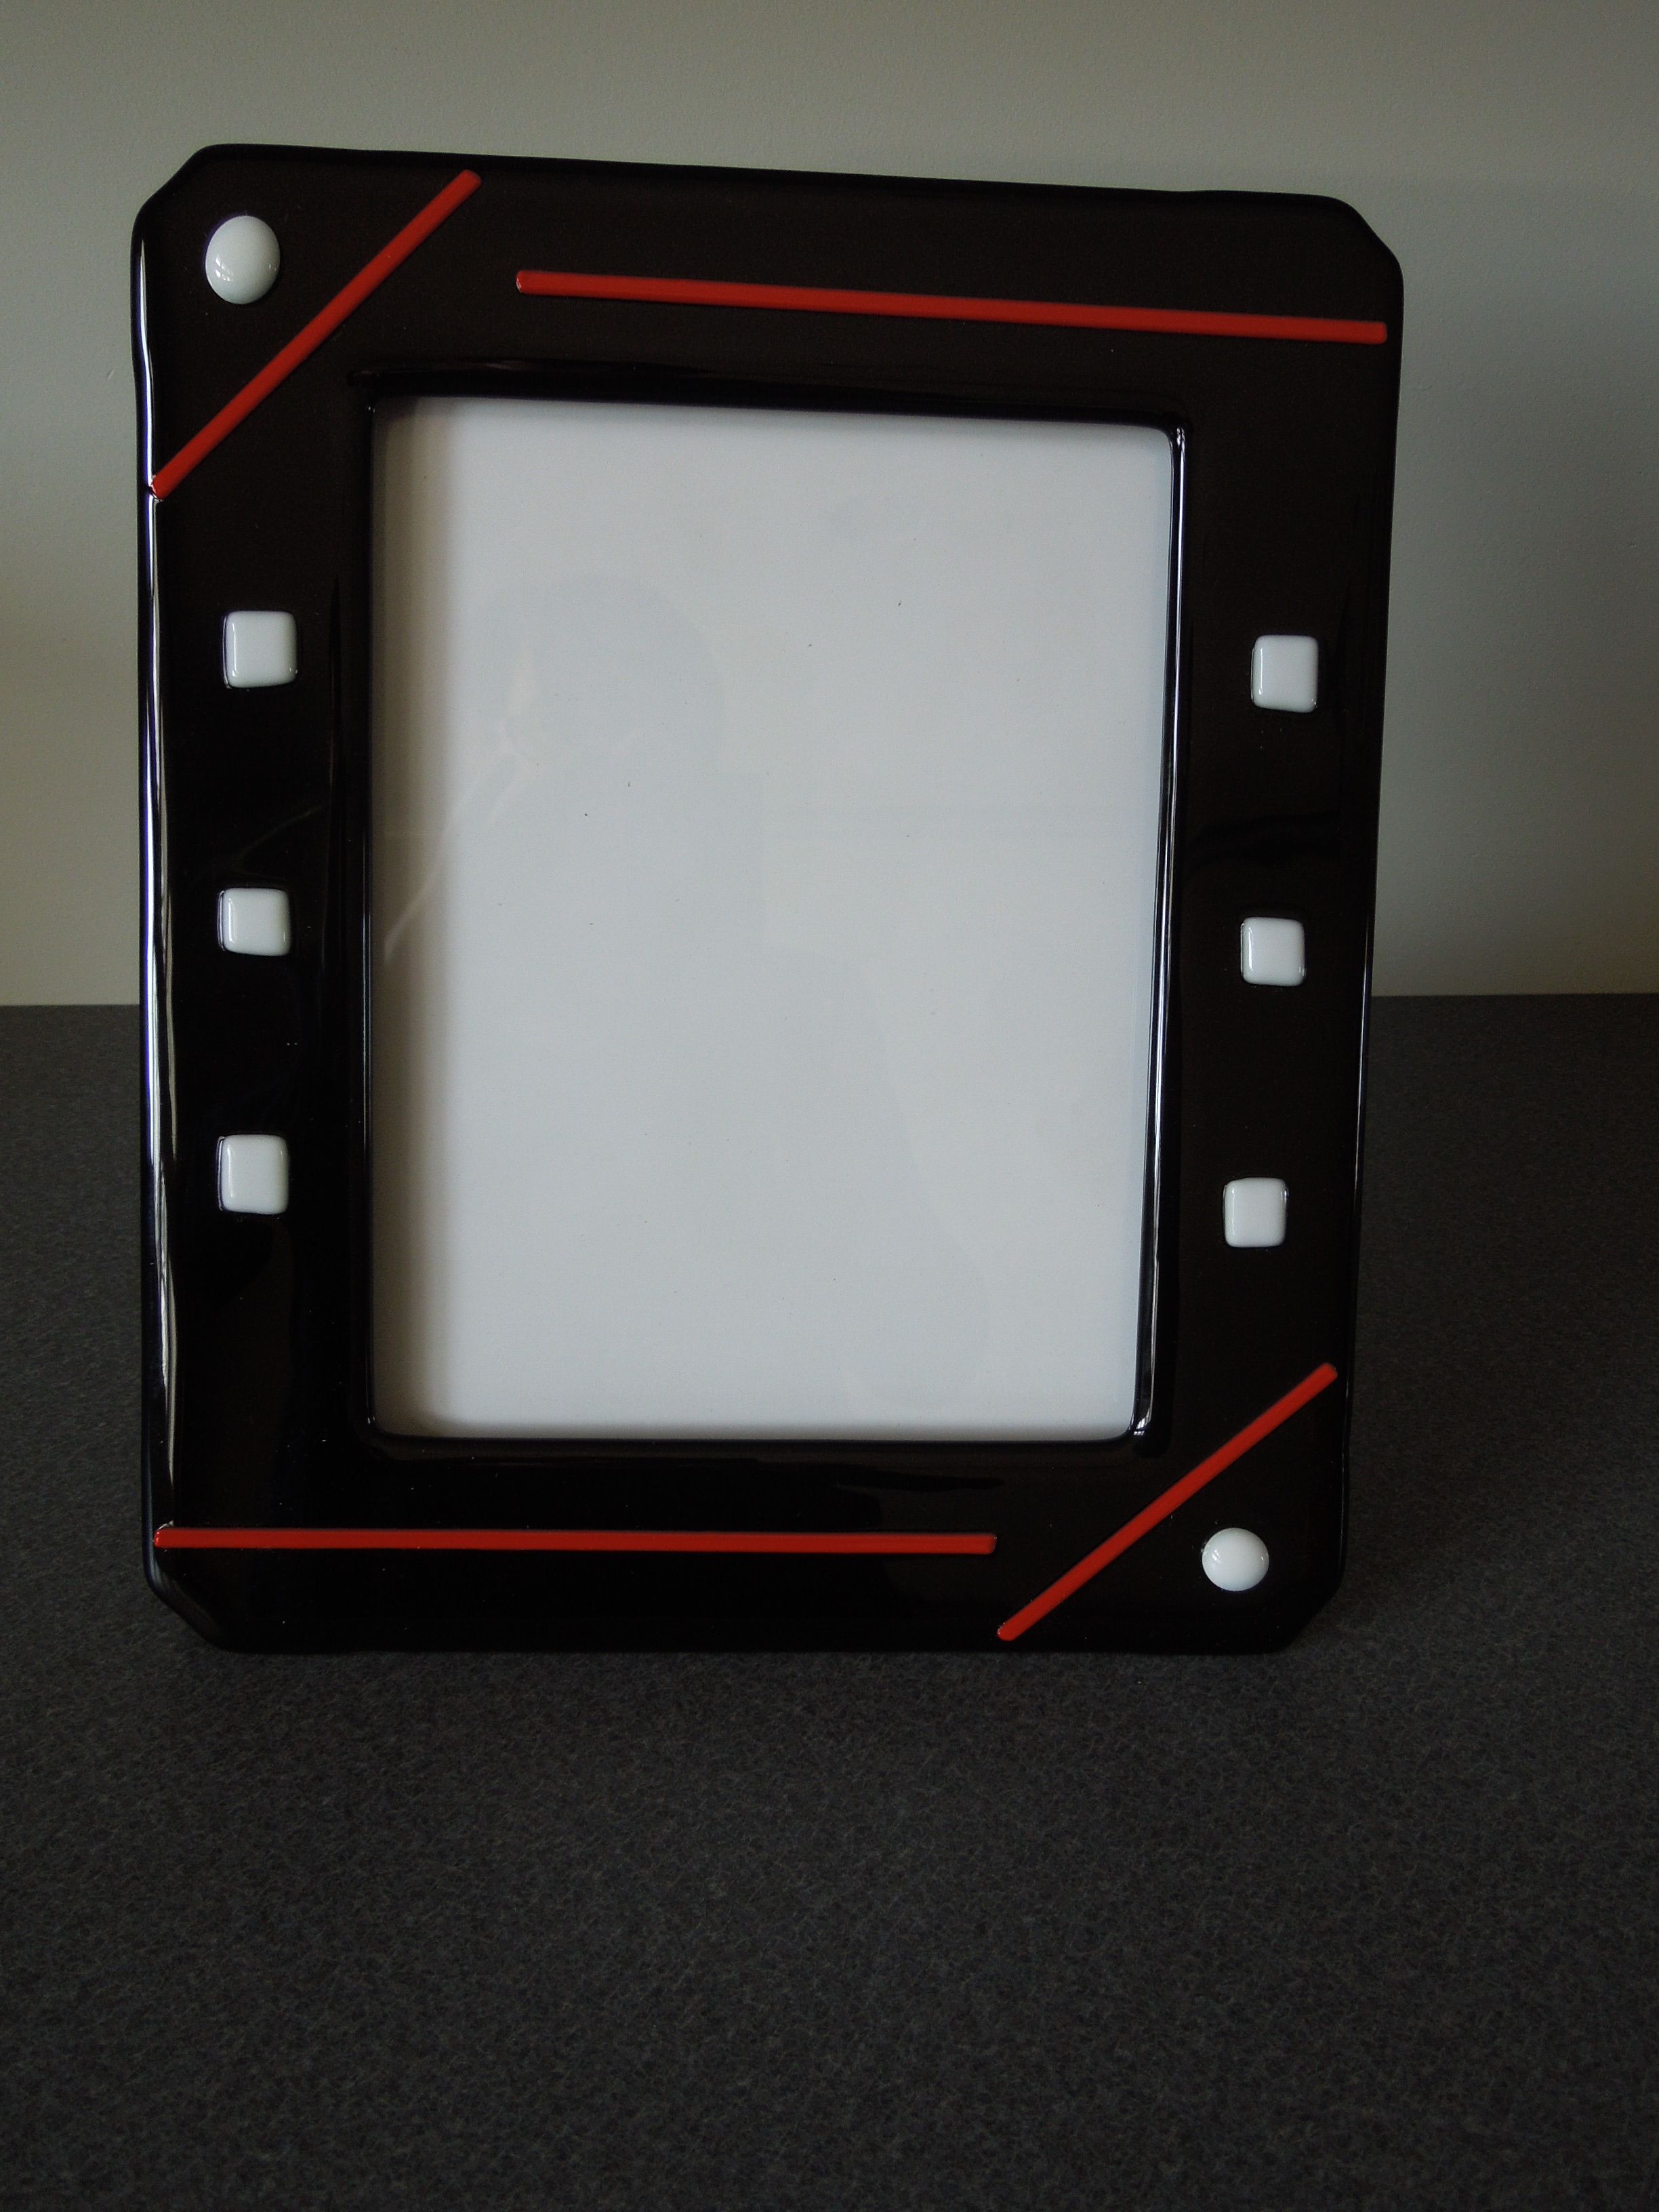
As the finale, here is the frame I made to hold my father’s picture. It is a black 8″x10″ frame with the geometric glass highlights tack fused on for interest. Note that I rounded the corners since the frame barely could fit in my kiln (13″ diameter shelf).
I’m so glad I figured out how to make these glass picture frames. My mind is racing with more project ideas. Time to go back into the studio!


April, I just stumbled onto your website and love your Art Glass creations. What frames do you use at Michaels for your designs?
December 7, 2015 at 9:06 AM
I usually get the basic frames when they are on sale – white wood if I’m using white glass and black wood if the glass frame will be black. It looks like the ones I used most recently were Simply Essentials brand. The most important feature is the front of the base frame must be flat. If it is rounded or beveled, it is harder to glue the glass to.
December 7, 2015 at 10:00 PM