
Shattered

*!@#%^*!!!!
Yup, that echoed throughout my studio when I checked a kiln run that was ruinous. I had been lured into a compulsive buy at a glass supply store. The specialty glass piece had multi-hued green shards on top of a blue swirled opaque white sheet. I thought it was perfect for one of my organic shaped vases.
During the initial heating process, right around 600 F, I heard a loud noise but didn’t know what it might have been. I wasn’t about to violate the basic rules of fusing glass and look inside the kiln when it wasn’t above 1100 F. When the temperature did reach the expected slumping point (~1200 F), I took a peek. Oh no!
This is what I saw.

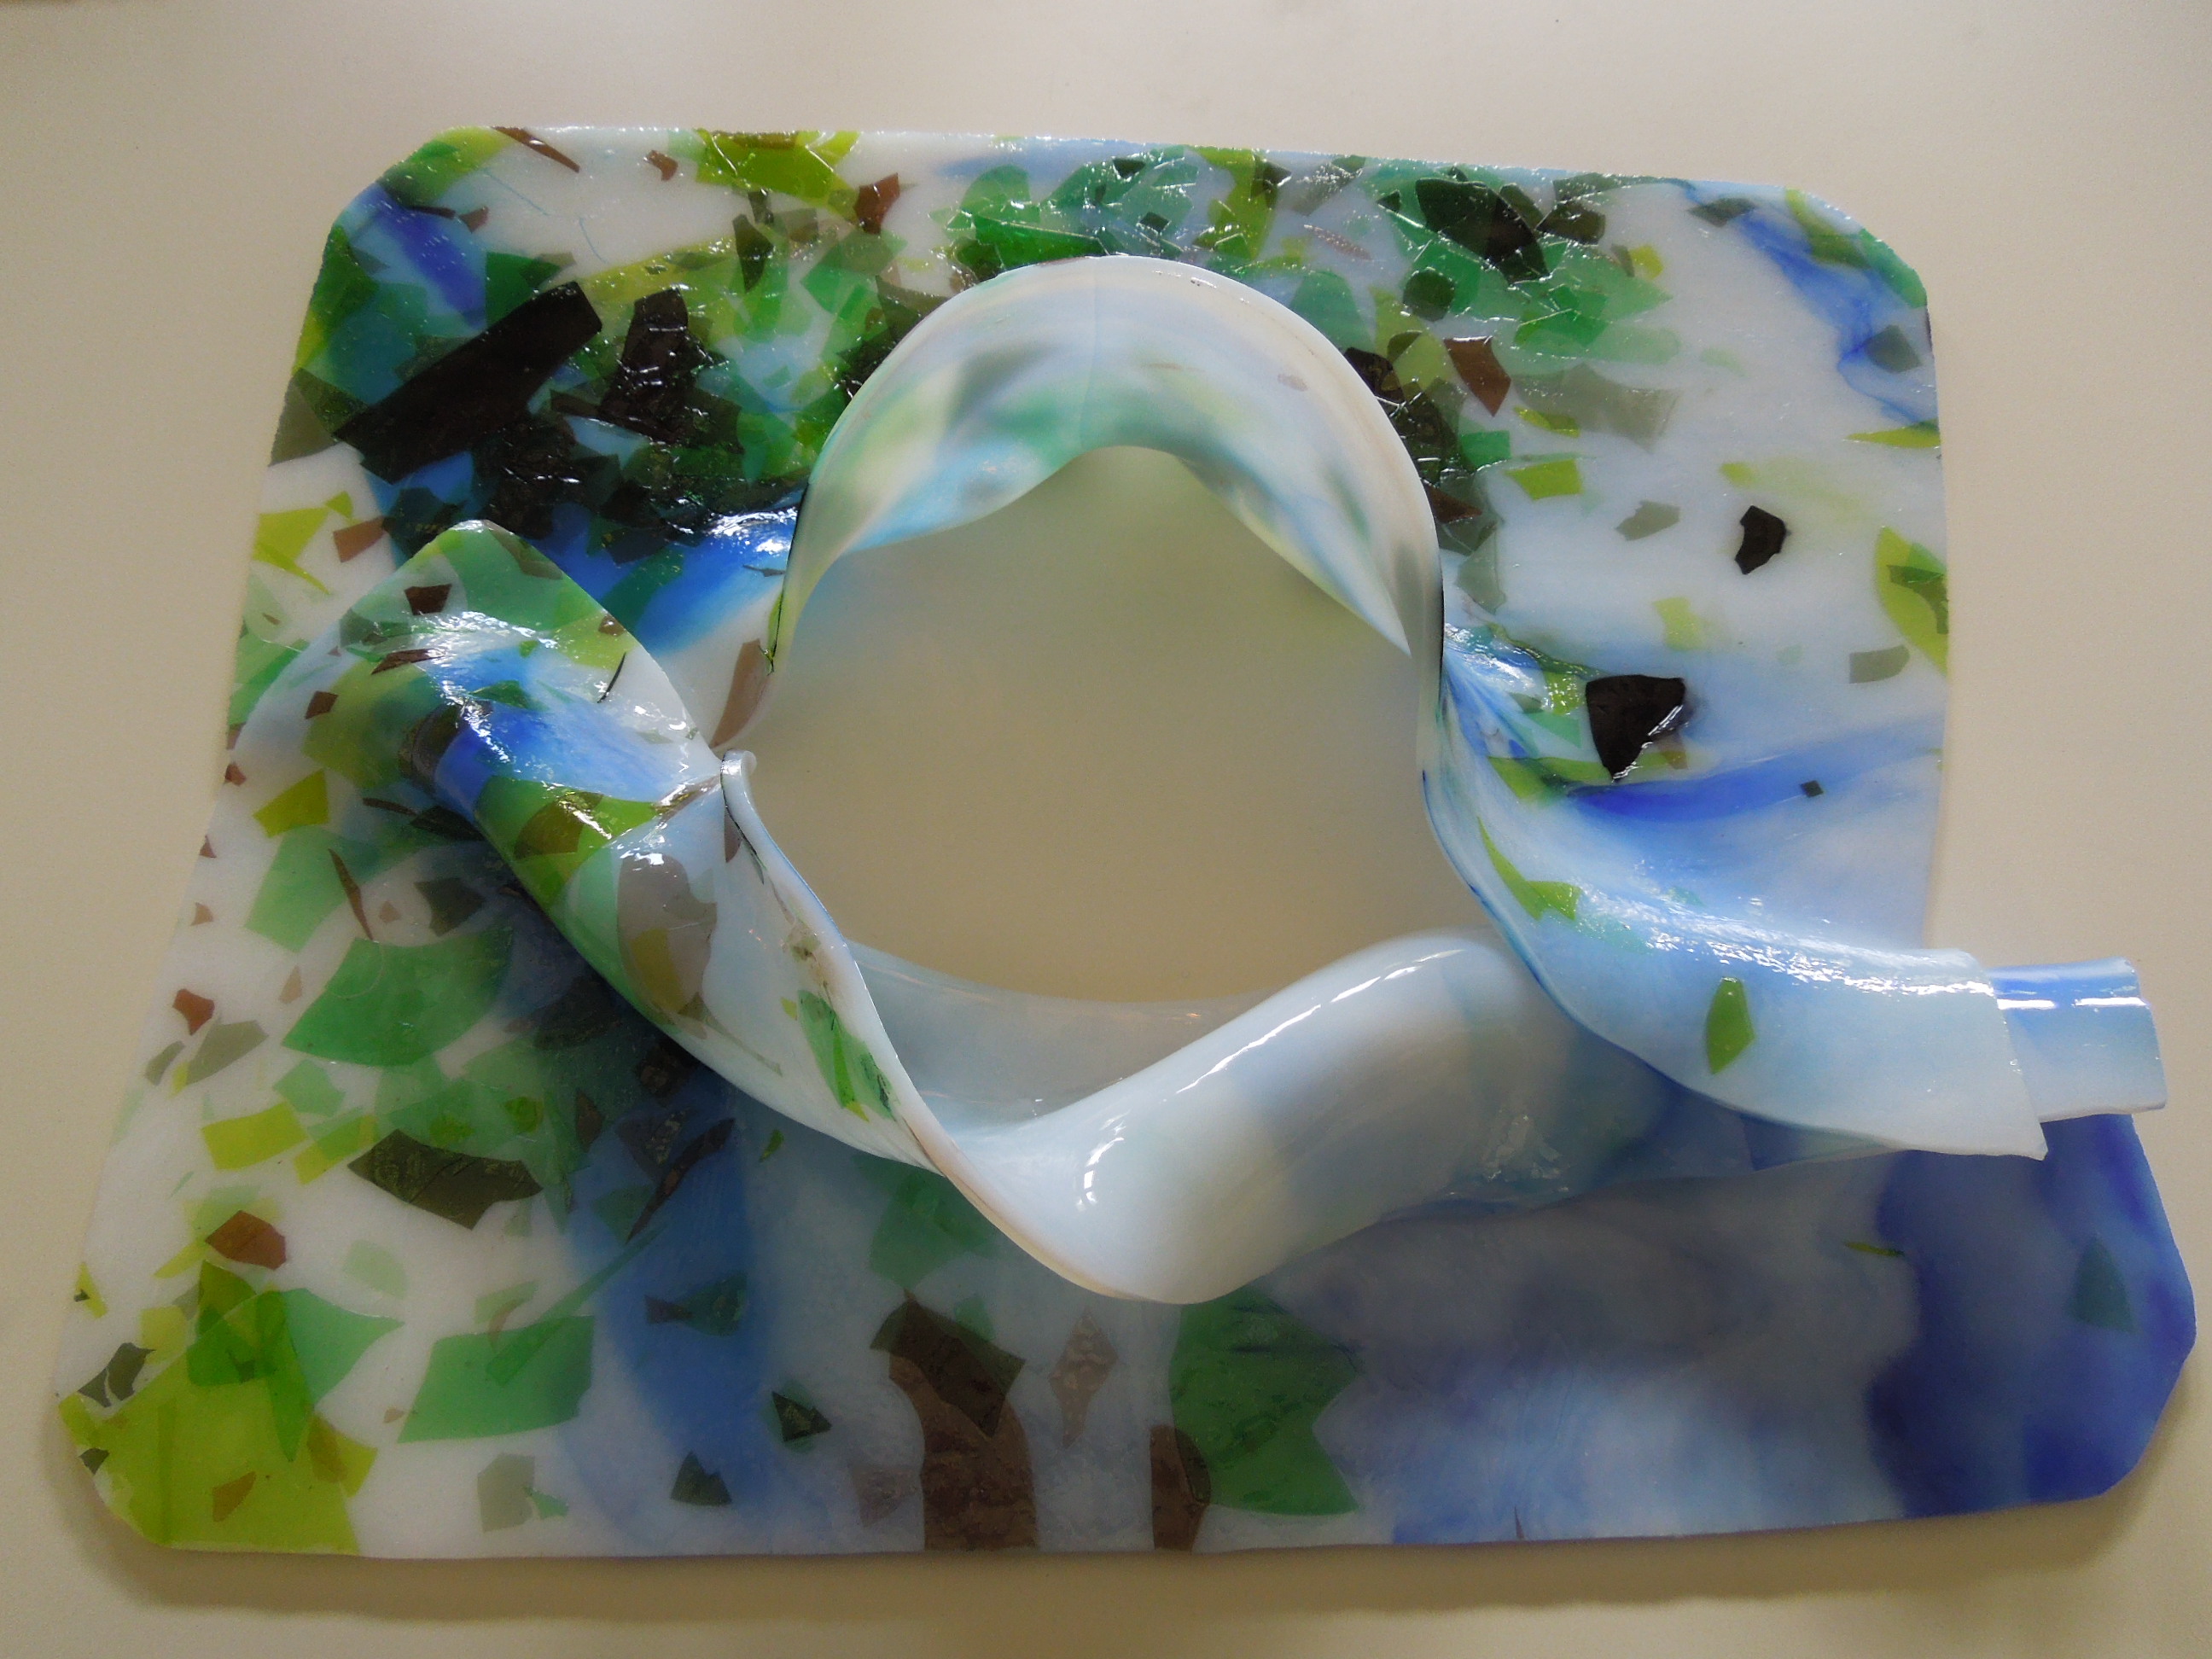
The center of the glass had split open and the entire piece had fallen down around the mold instead of slowly draping over it. I think the noise I heard was the glass splitting open. Maybe the glass had not been properly annealed when I obtained it? I used my standard ramp rate for heating the glass – after holding for 15 min at 300F, ramp to 1100 F at 300 F/hour.
This odd glass imitation of a mounted fish (I could only see a big bass mouth mocking me) stumped me for many months. What would I do with it?
Hammer time!
Yes. I attacked this with a hammer and smashed this oddity into pieces. I could start over.
I choose to tack fuse some of these shards onto an opaque white sheet.  Now it was time to try to drape this over a floral former to create a vase.
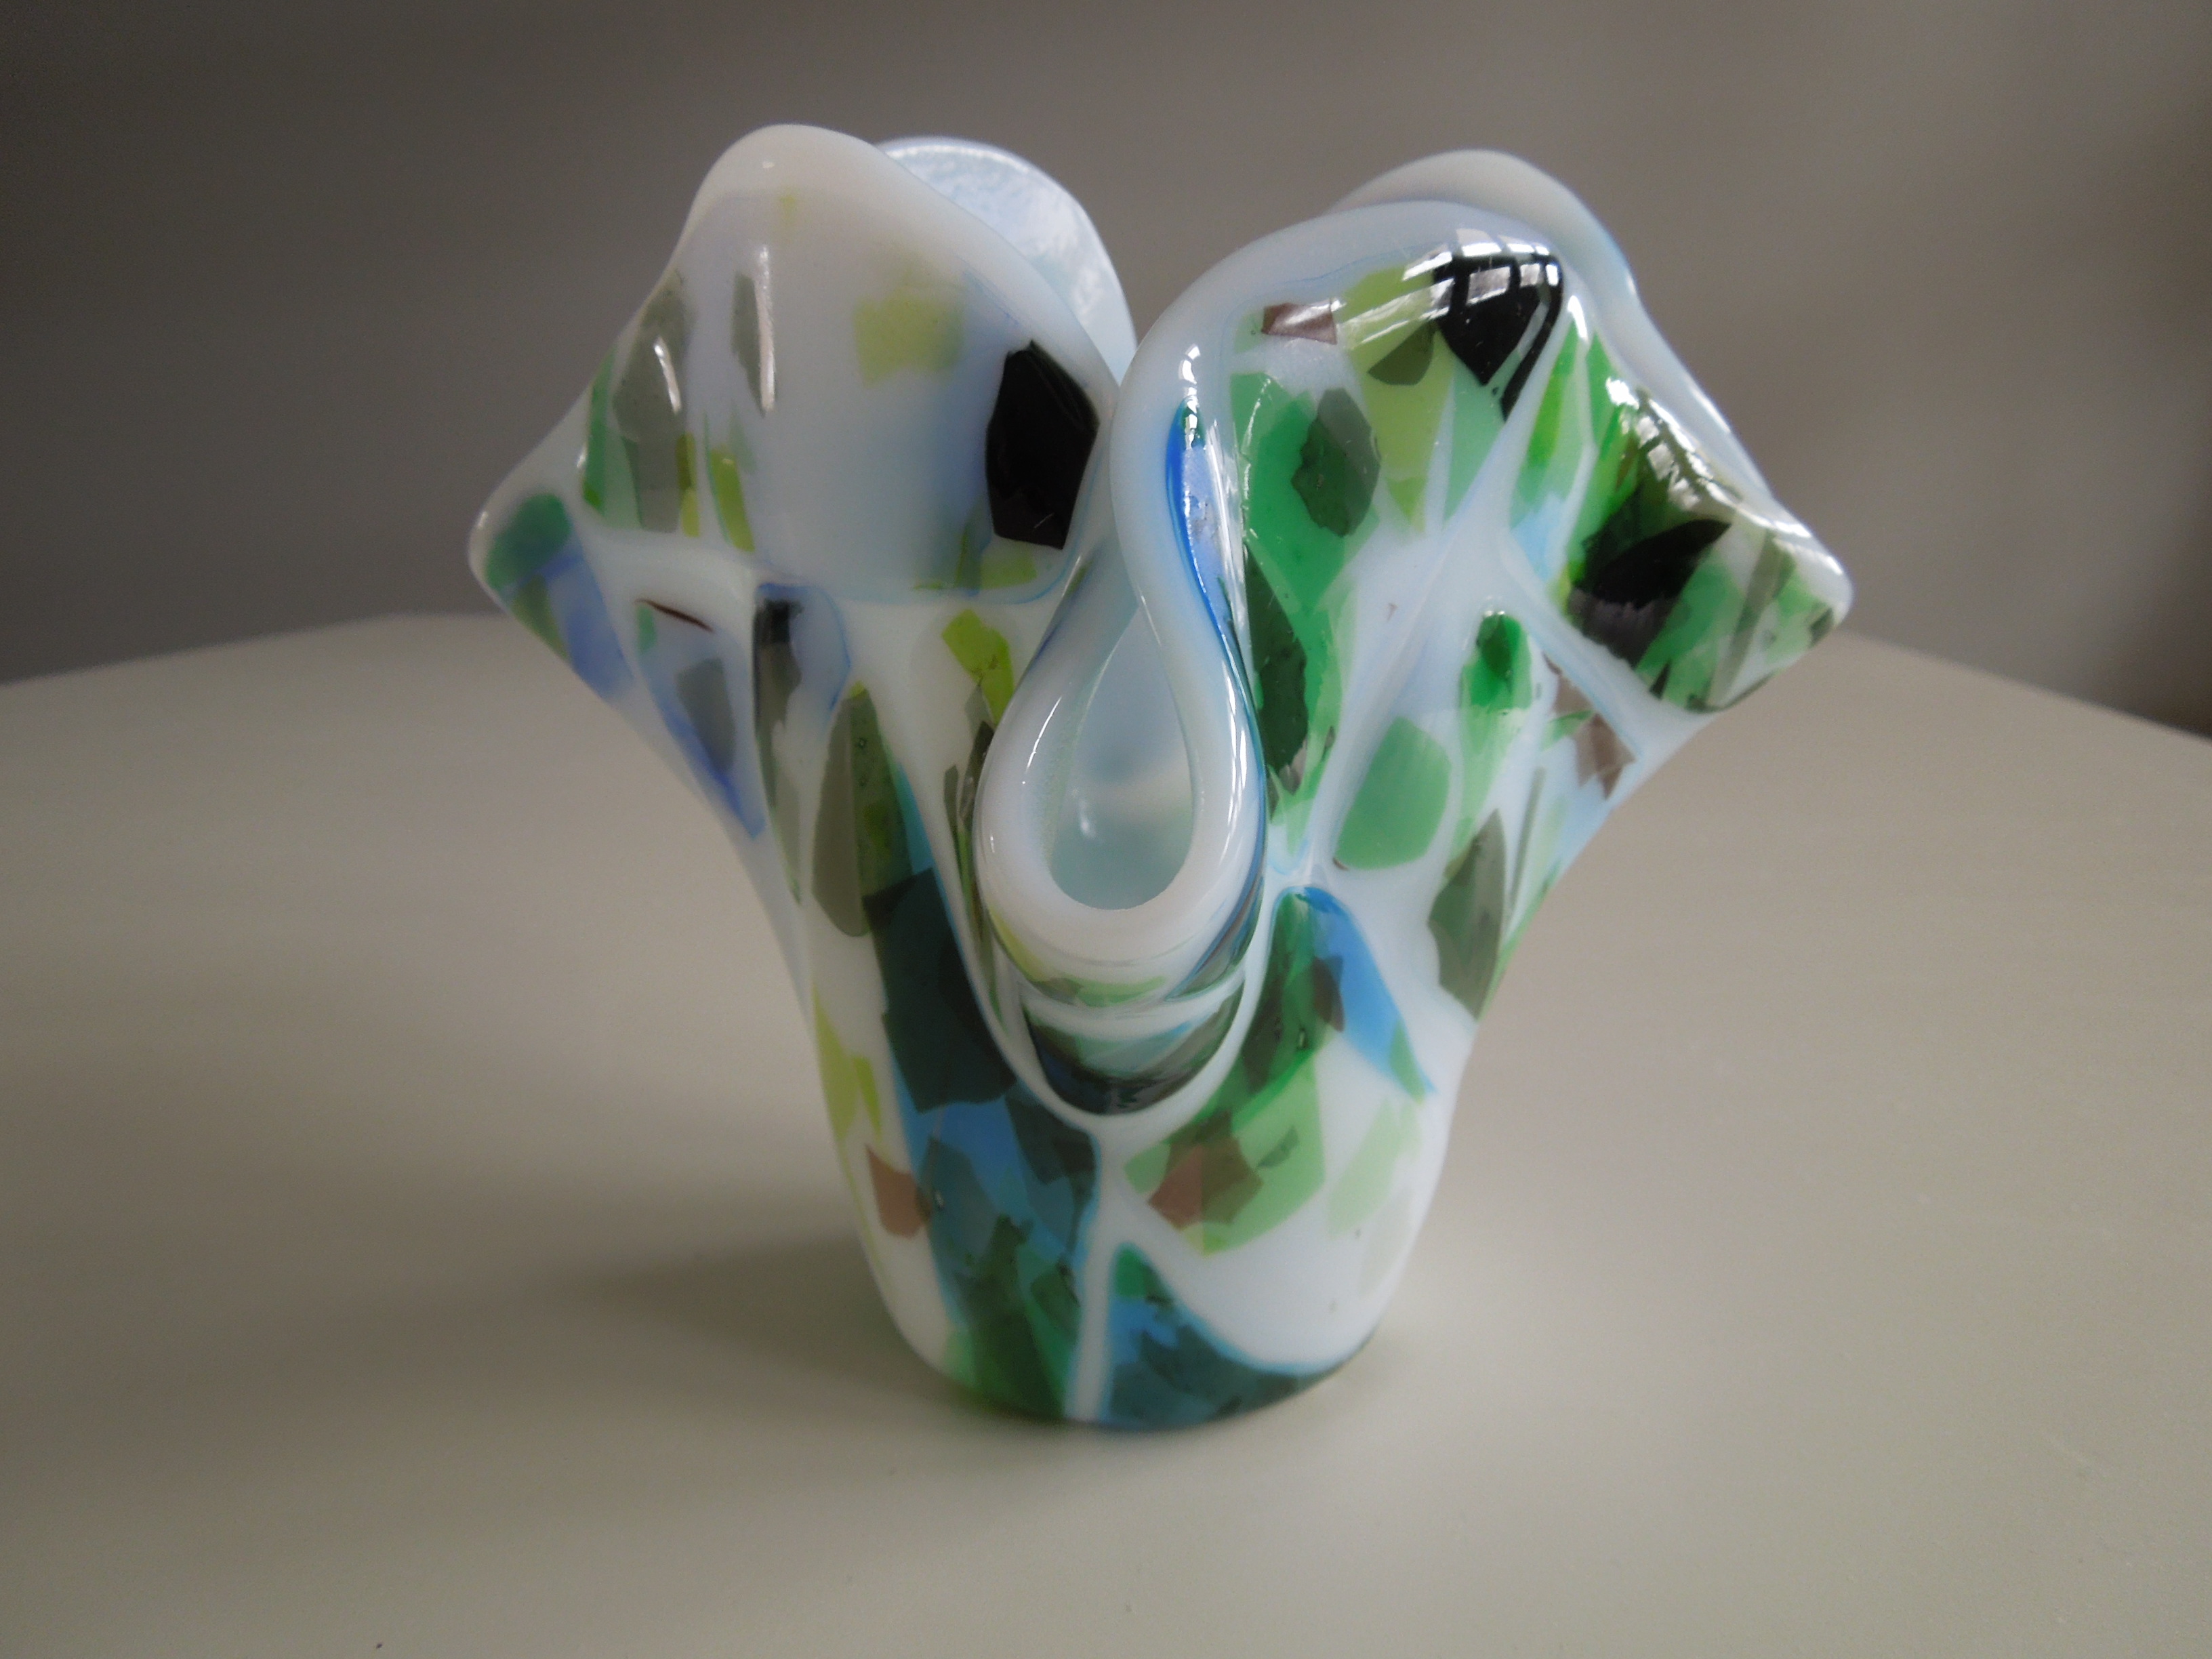
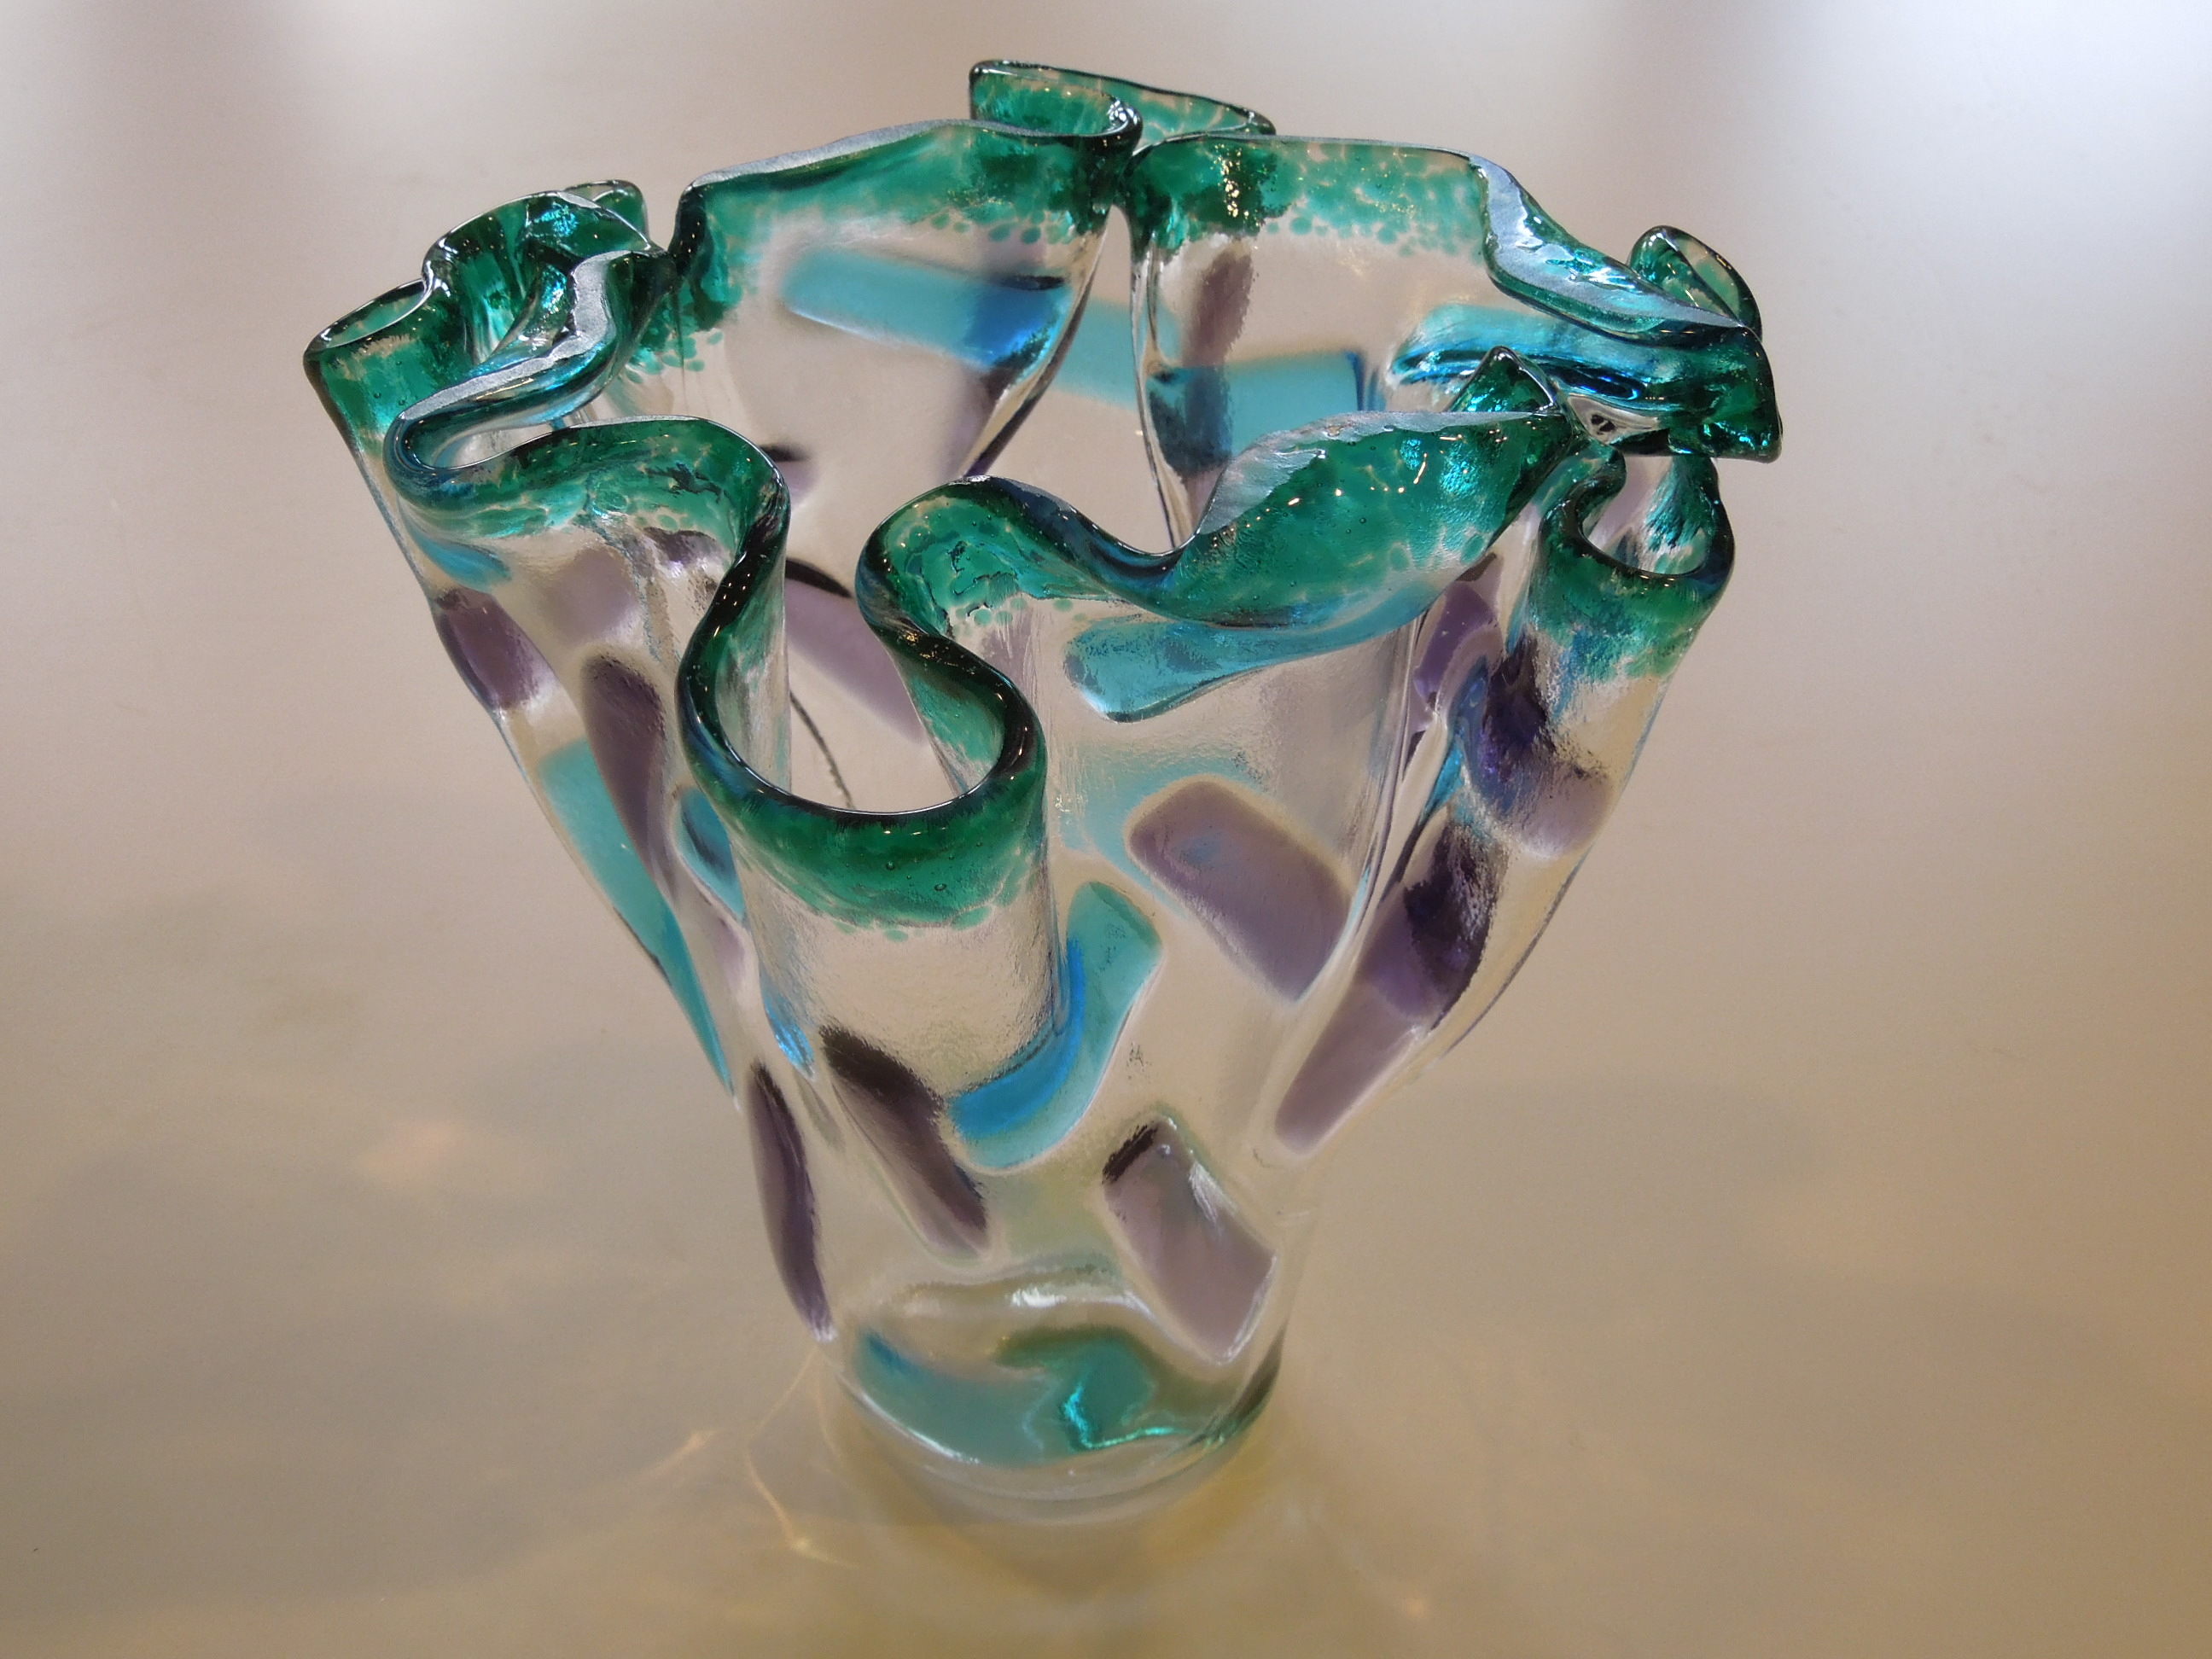
Success!!!! I’m happy with how I recovered from one fusing disaster to create something exciting. Perseverance pays.
Less is More – Downsizing a Vase

We’ve been taught to believe that bigger is better. When presented with a draping mold, I always made full use of it. A mold that stands 7″ high should produce a vase that also stands 7″ high. But of course! In fact, I’ve been apologetic that I couldn’t produce larger, more glorious vases due to the size of my kiln.
Imagine my surprise when I got an inquiry about miniature bud vases. What exactly did they want? A tall but narrow vase? A short vase? And more importantly, what could I actually make? I had never considered my options.
Let’s start with the draping molds or so-called floral drapers I had access to.
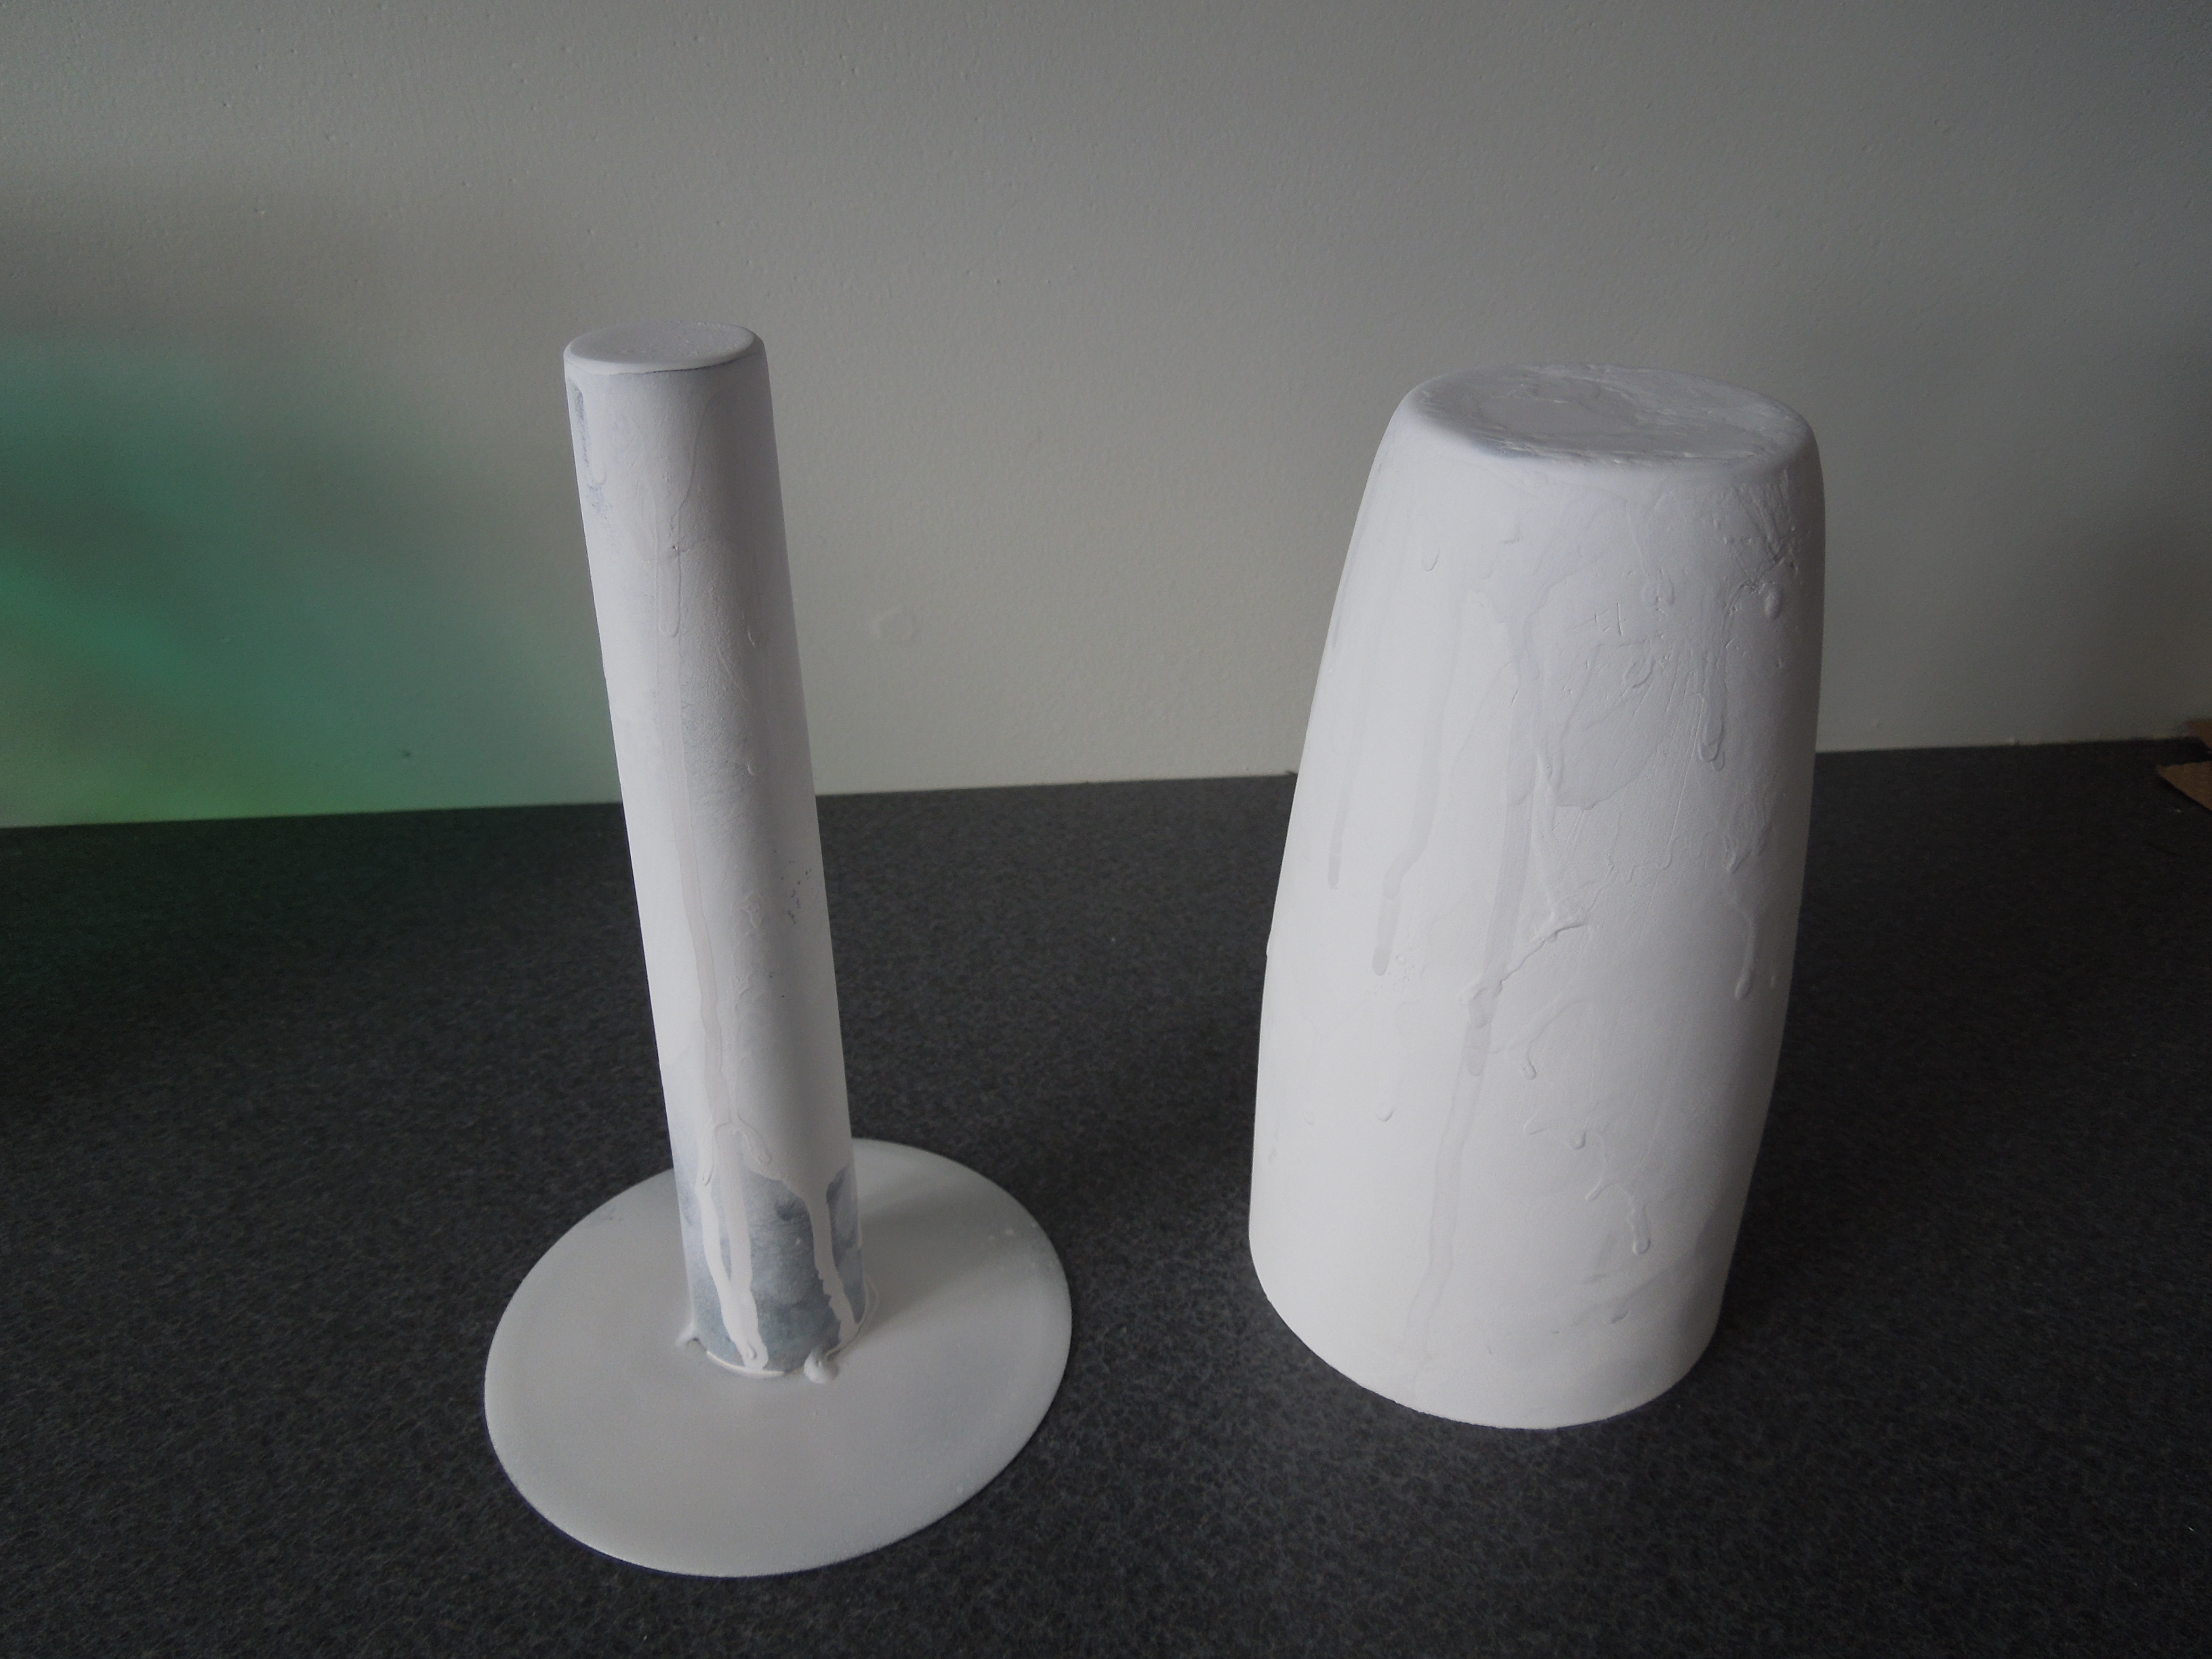
On the right is a mold which stands 7″ tall with a top (the final vase base) that is 2.5″ in diameter. On the left, is a stainless steel pillar also 7″ tall but with a narrower 1″ diameter. Both have been coated with boron nitride (MR-97) which is a glass mold release and makes the shiny stainless look white.
All my previous vases started with a 12″ sheet of glass that would drape around the mold at elevated temperatures and produce a 7″ tall vase. (See my previous post https://geekgirlglass.com/2013/10/19/feeling-the-heat-temperature-dependence-of-draping-vases/) . My obvious first attempt to shrink a vase was to repeat the process but starting with a 8.75″ sheet of glass with rounded edges. The result was a funky, short fat vase that stood 5″ tall.

How about using the 1″ diameter floral draper? I went with a 6″ square of rose colored transparent glass. (Yes, I kept decreasing my starting glass size). That ended up with a 4″ vase with a small 1″ base and rosy’ flames’ creating the sides.
Smaller! Smaller!
Next attempt used a 7″ circle draped over the 2.5″ form. I played with blue frit on the border and confetti glass pieces to create a tribute to Mondrian. This ended up more like a bowl than a vase. Total height = 2″.
Fourth variation really pushed the limits. Only a 4.5″ circle of glass was draped over the 1″ form. This resulted in a truly petite 2″ tall vase. Perhaps this is only good for holding a few Jelly-Bellies?
Here is the final line-up of vase variations.
 As you can see, I have a much broader range of vase options than I thought. I had a blast pushing the limits of down-sizing with this project. In the end, I must agree with Mies Van der Rohe. Yes, ‘less is more.’
Feeling the Heat – Temperature Dependence of Draping Vases

One of my first exposures to fusing glass involved a very simple class where we selected 1 sheet of glass, cleaned it, figured out the center, and placed it over a form in the kiln. The instructor worked some kiln magic and after several hours invited us to peer into the kiln to see how the flat sheet of glass had begun to fall around the form. (This is technically draping and not slumping glass).
How cool! Was it really that easy to make beautiful glass vases? I didn’t know enough to realize what factors played a role in creating the magical whimsical handkerchief forms. Nevertheless, like a junkie’s first hit, I was hooked.
Yes, the instructor muttered under her breath about the danger of over-firing the glass and actually getting the mold stuck within the glass and having to destroy the glass and even the mold but who was listening? This post will not auger into disaster scenarios, though. (There is plenty of time for examples later…).
With time, I have begun to see the versatility possible with creating vases. Obviously one can fuse many pieces together to create a 2D sheet that is far more complex and exciting than a single color sheet of glass like I was first exposed to. Another Boulder artist, Bobbi Vischi (www.bobbivischi.com), takes this to an awesome level.
The key to the final shape all comes down to temperature. I have conducted a experiment creating vases that have been taken to different slump temperatures. Remember, glass most soften and begin to melt. The amount the glass ‘melts’ is temperature dependent. The glass will first seem to fold along one axis creating what is affectionately known as a ‘taco’ (or is it because this always seems to occur at lunch time during classes?). As the temperature is increased, the glass moves more and additional folds are created. At higher temps, the glass really begins to take on the form of mold it is draping over. Go much further and you are risking it all.
‘Don’t forget time!’ you may say but that seems almost secondary to the ultimate heat the glass is exposed to. At low temperatures, even if I hold for an extended period of time, I can’t seem to move much beyond the taco shape.
Pictures tell the story the best. In all cases, the kiln firing schedule was as follows:
Ramp 150F/hr to 300F and Hold for 15 minutes
Ramp 300F/hr to 1100F and Hold for 20 minutes
Ramp 150F/hr to SLUMP TEMP and Hold for X minutes
Cool 400F/hr to 950F and Hold for 1 hour
Cool 150F/hr to 800 and Hold for 10 minutes
Example 1: 1175F for 1 min (Hit Taco shape at 1100F) Example 2: 1200F for 1 min
Example 3: 1225F for 1 min (about as far as want to go)
Now back to experimenting with my vases….


